Who doesn’t love fall? I feel like it’s the one season where everyone can find something to love, whether it’s Halloween or Thanksgiving, the crisp weather or you know – pumpkin spice everything!
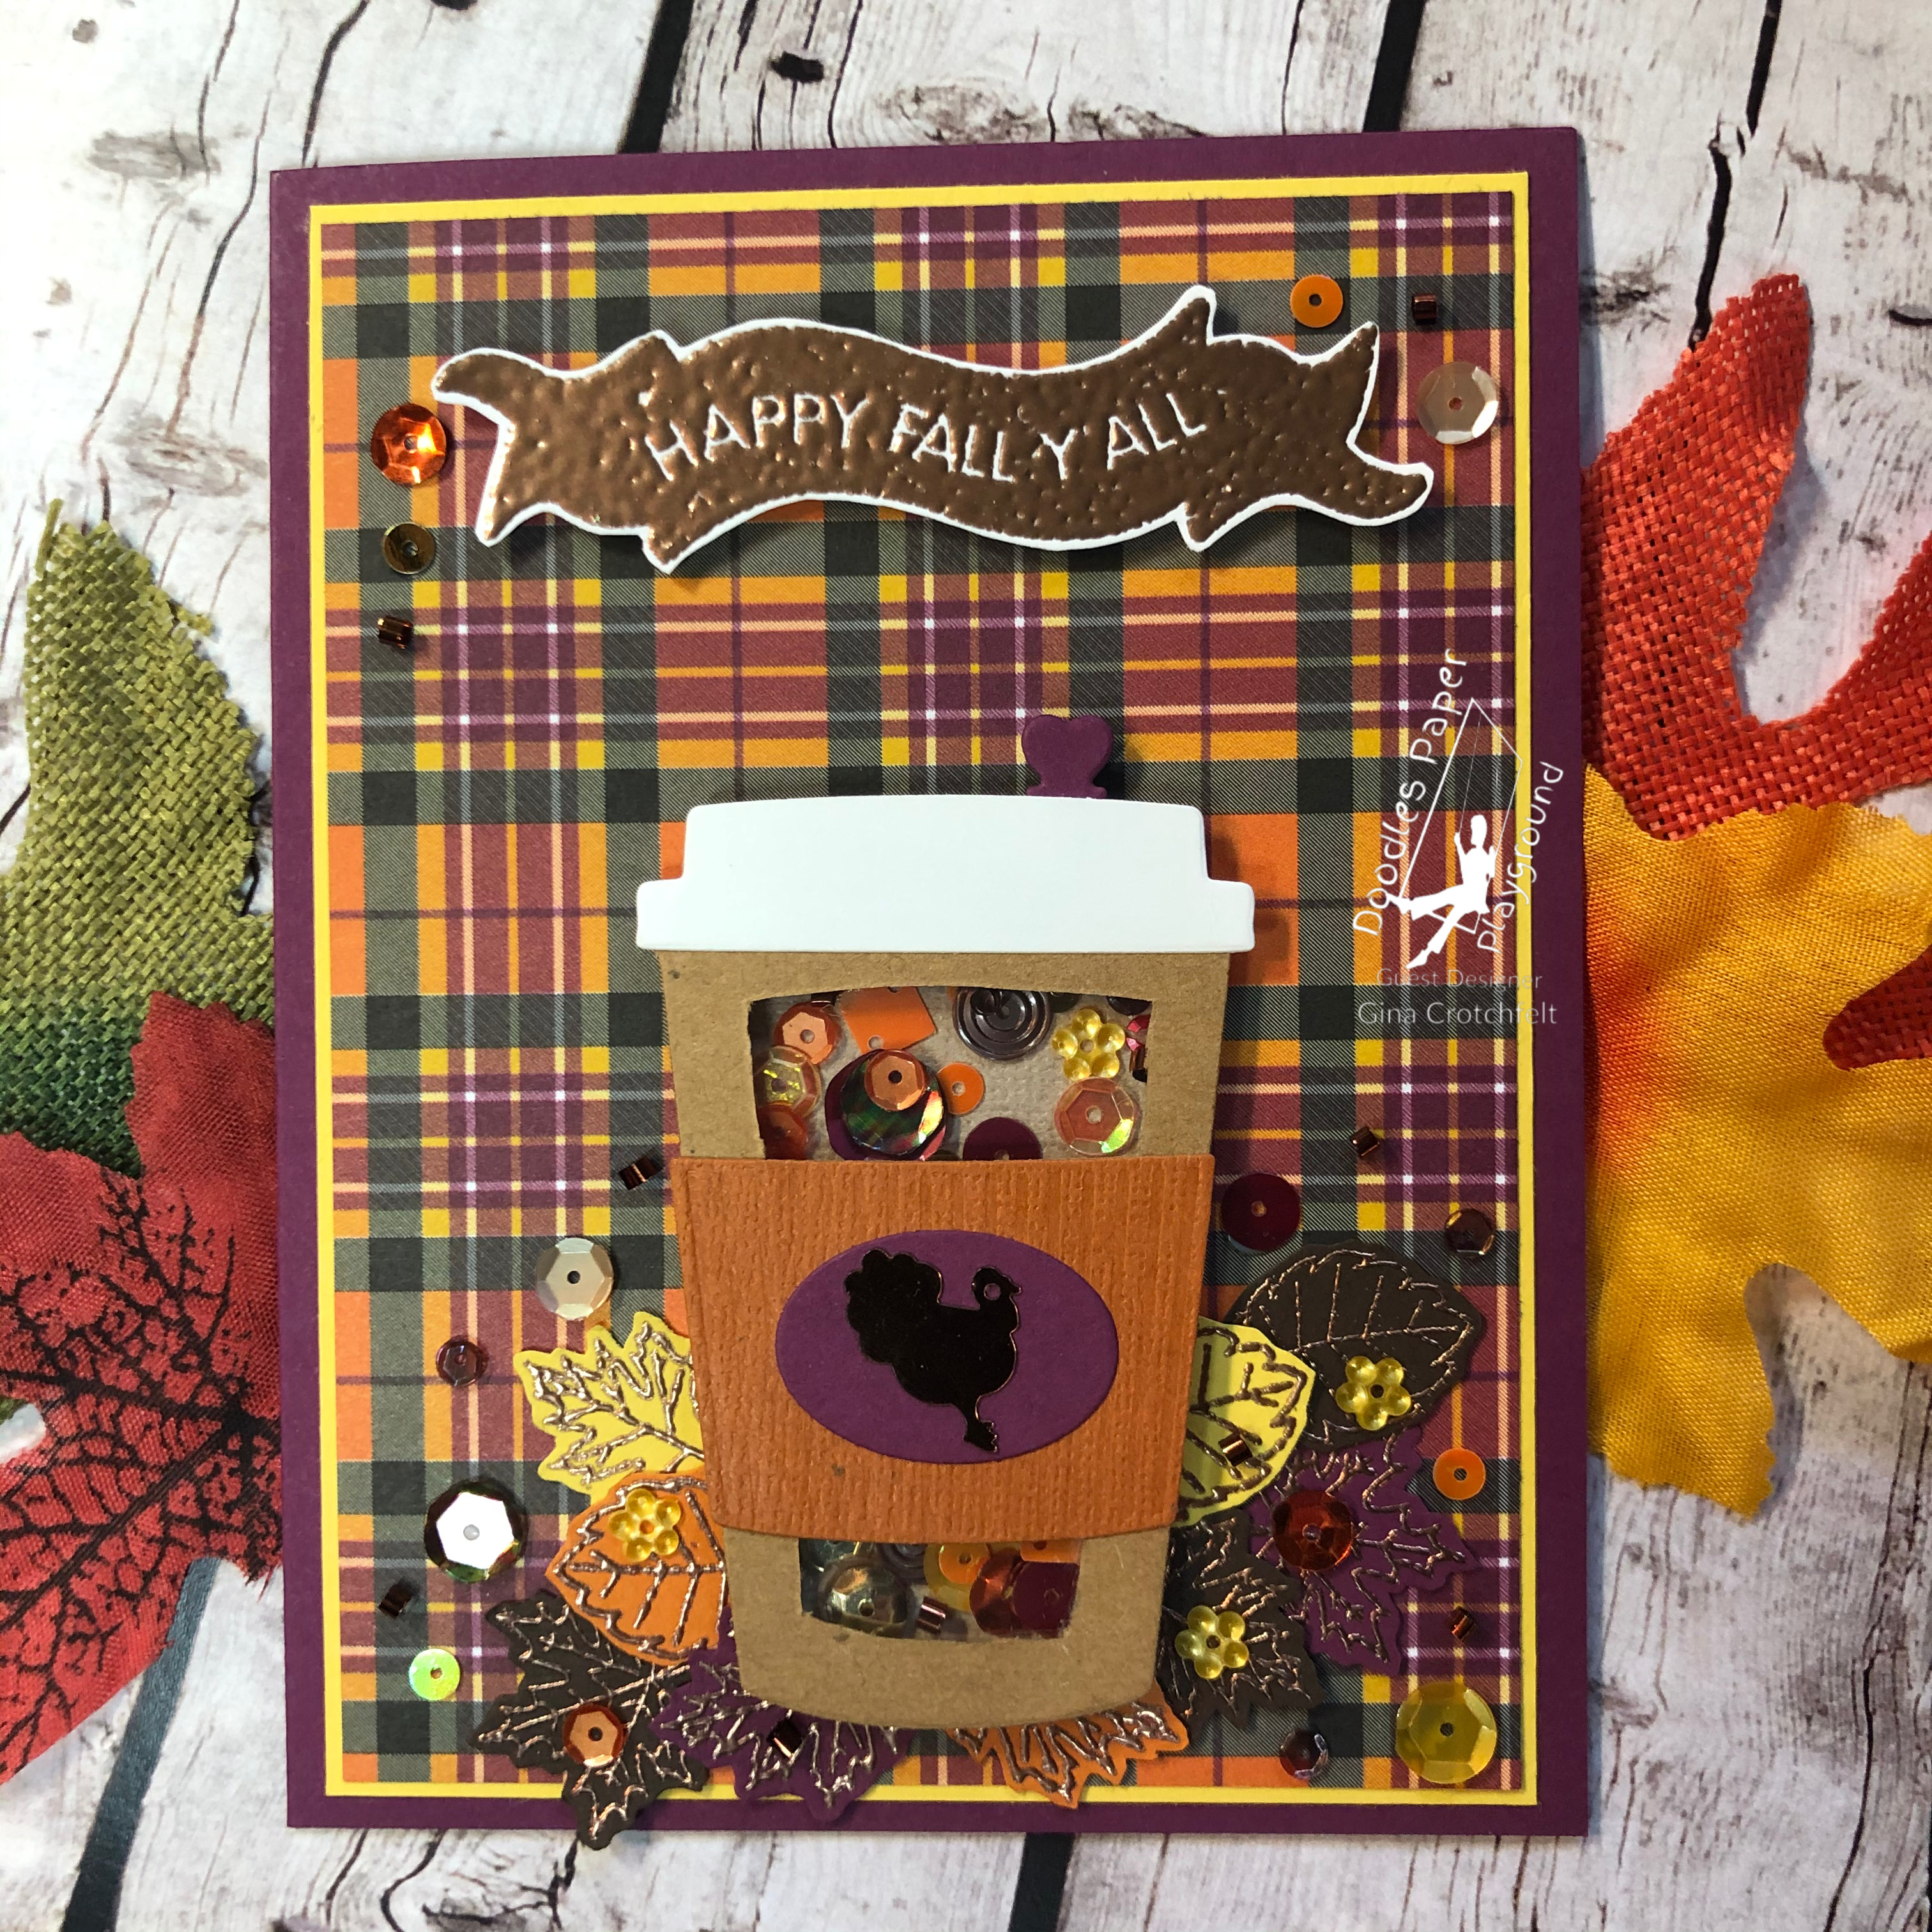
This card is a nod to a few of my favorite fall things…the beautiful colored leaves, Thanksgiving and yes, pumpkin spice everything. It was truly inspired by the “Give Thanks” Sparkle Blends that was part of the New October 2020 release from Doodles Paper Playground. The colors caught my eye right away and I couldn’t wait to build a color palette off it.
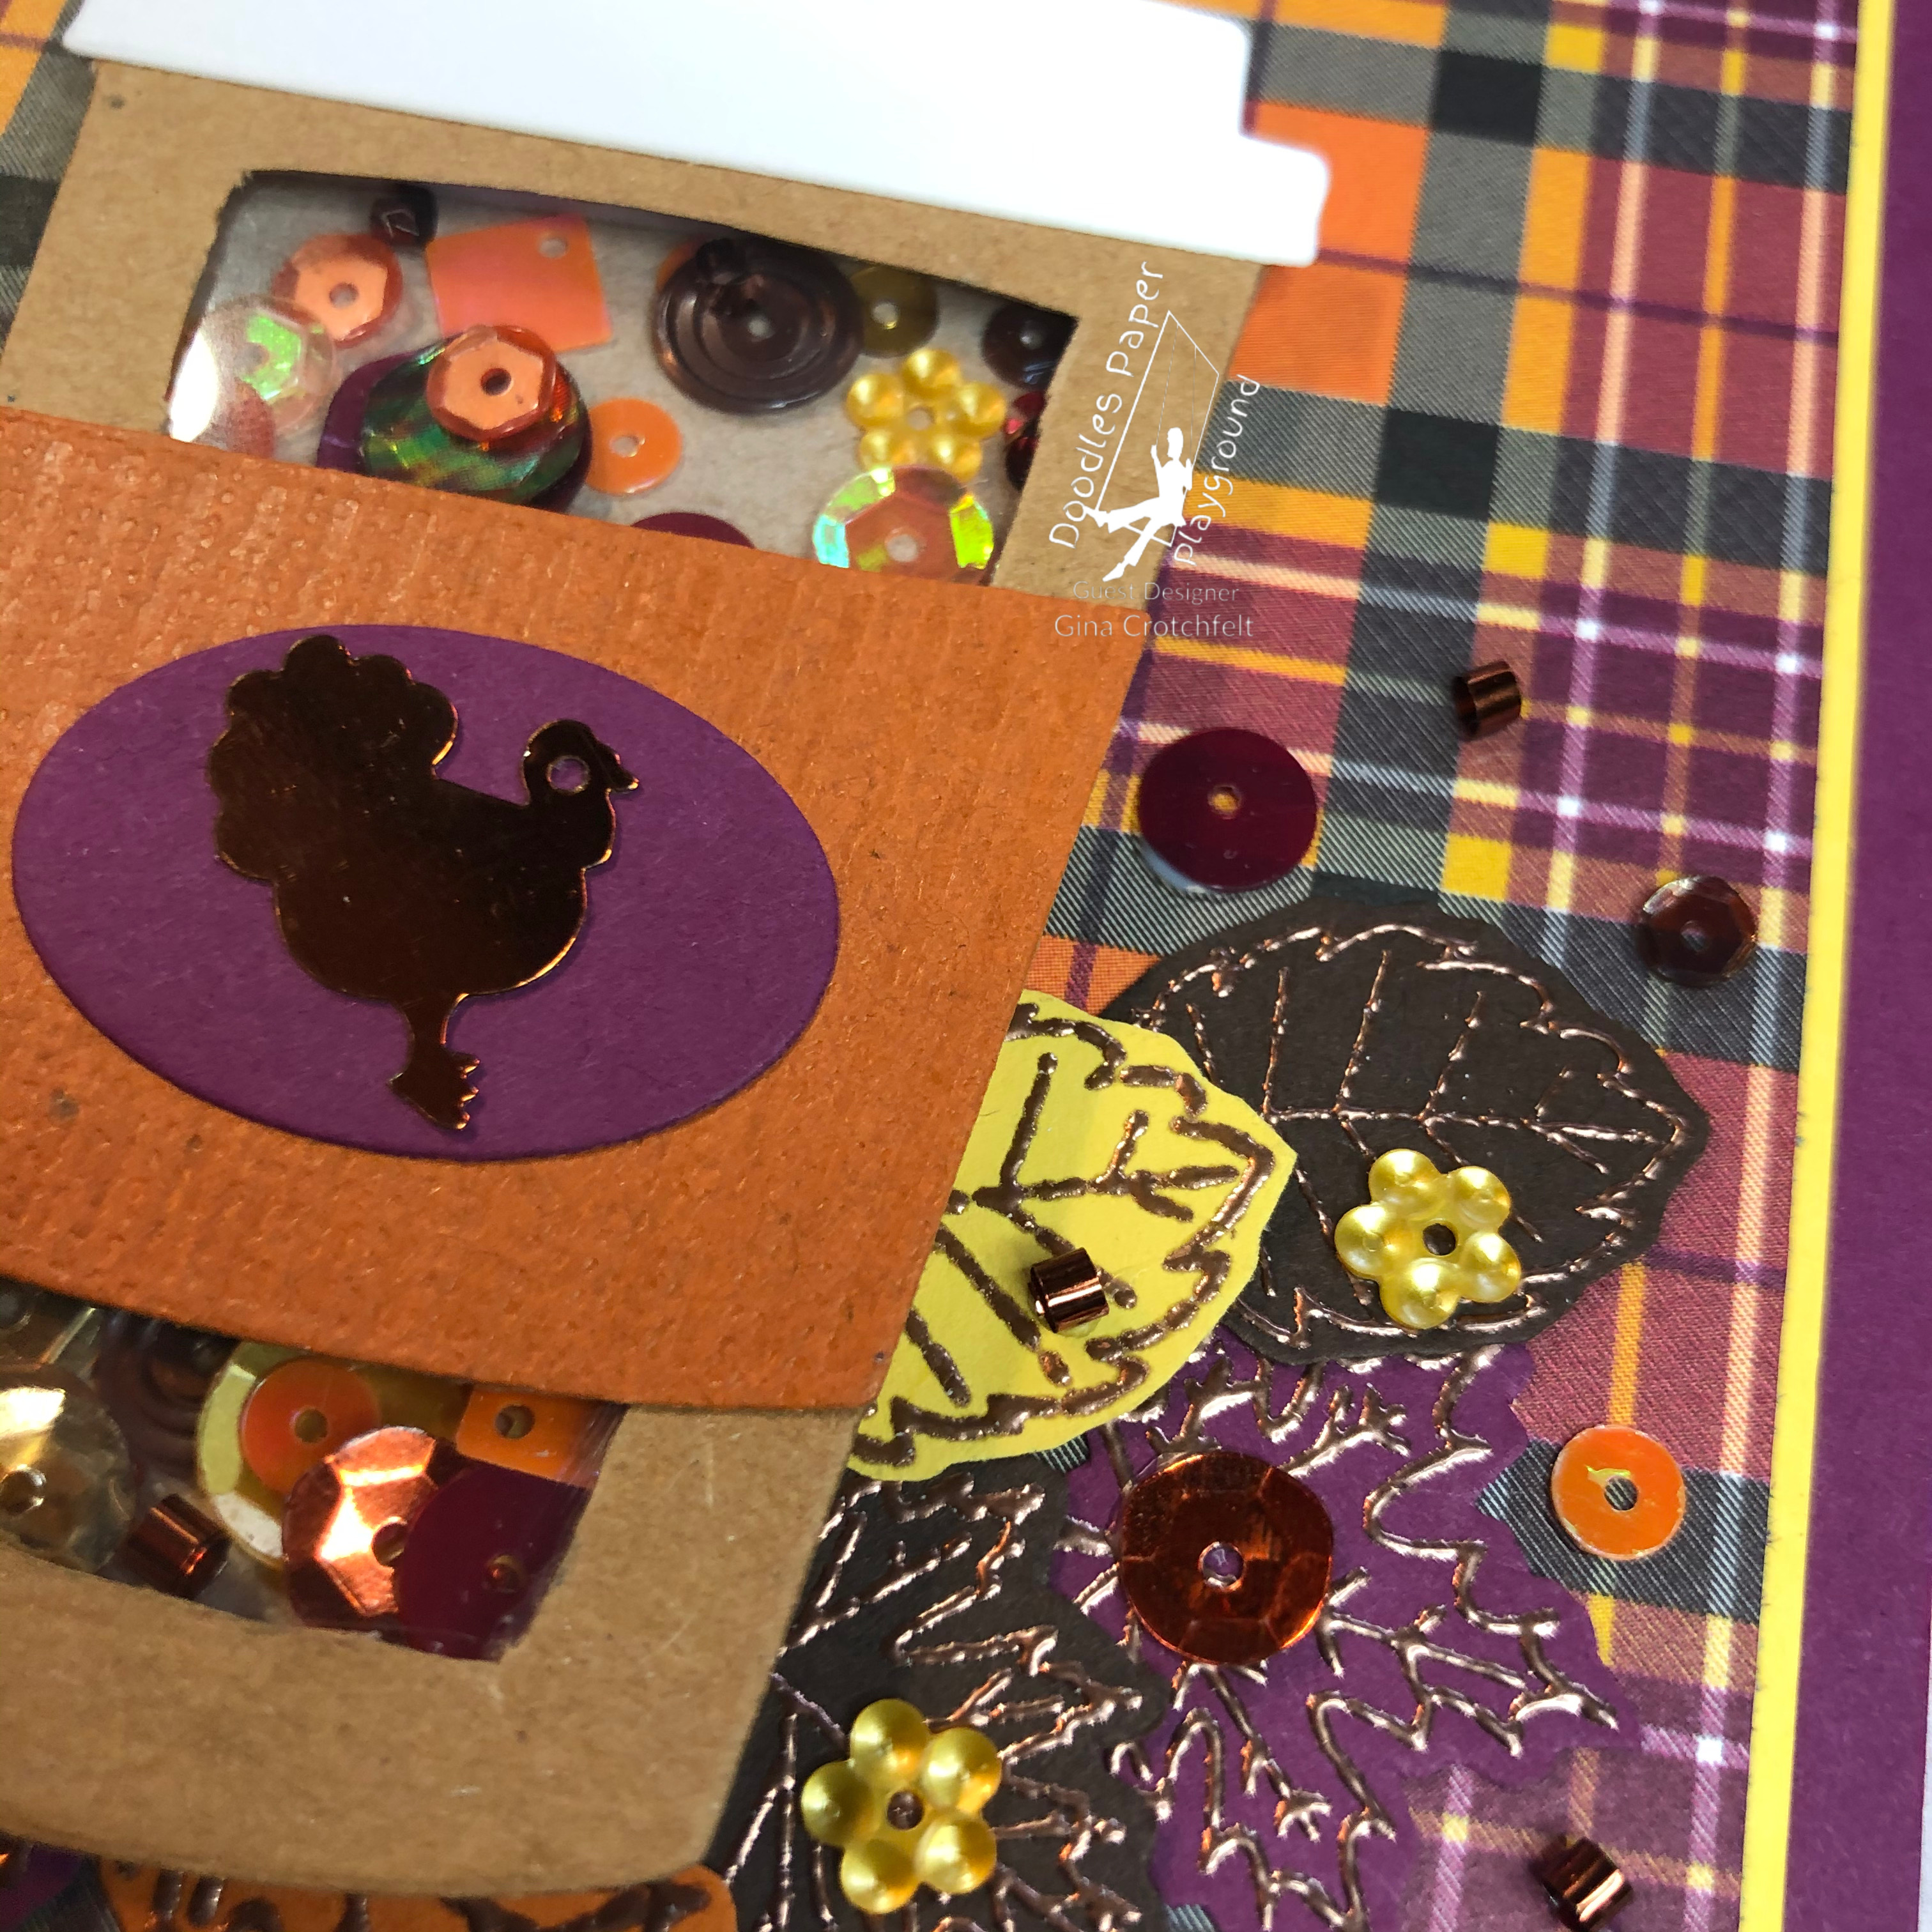
There’s a lot of things I love about this card. The plaid paper is from one of my favorite paper packs from Stampin’ Up called “Plaid Tidings.” It’s become a staple in my paper stash. I love the copper embossed elements. I think they are a perfect accent to all the shimmer and shine in the Blends. And did you notice…there are no pumpkins! Even though I love pumpkins, I ended up leaving them out. I was having so much playing with the leaves, I didn’t think I needed the pumpkins. And, the turkey was the perfect accent for the cup.
Did you see I used the Sparkle Blends in 3 places? That turkey I mentioned is one. Another is in the shaker. And lastly, I handpicked and placed various elements around the cup and sentiment. I wanted a suggestion of leaves swirling in the crisp, fall air. I love when I find different ways to use the Blends, especially when they can evoke a feeling or suggestion.
I hope this card gives you a sense of all there is to love about this time of year and I hope that you go and make stuff and be happy!
Do you have a preference? I’m not sure I do. But I was curious to do a side by side and see what really differed between the two. I was never a big fan of watercolor painting. It felt too out of control. I’ve not touched them since college where I persisted through an entire semester of a watercolor class trying to use the medium as thick as possible and lie to myself that it really was just watered down acrylics. Side note: it didn’t work. However, since I love the look and effects that can be created, watercolor markers have been a solid alternative for me and I’ve been using them for about a year now. I feel more in control of the pigment with the markers. Although it had been so long since I picked up a traditional paintbrush and some watercolors, as I mentioned, I thought it was time to go back.
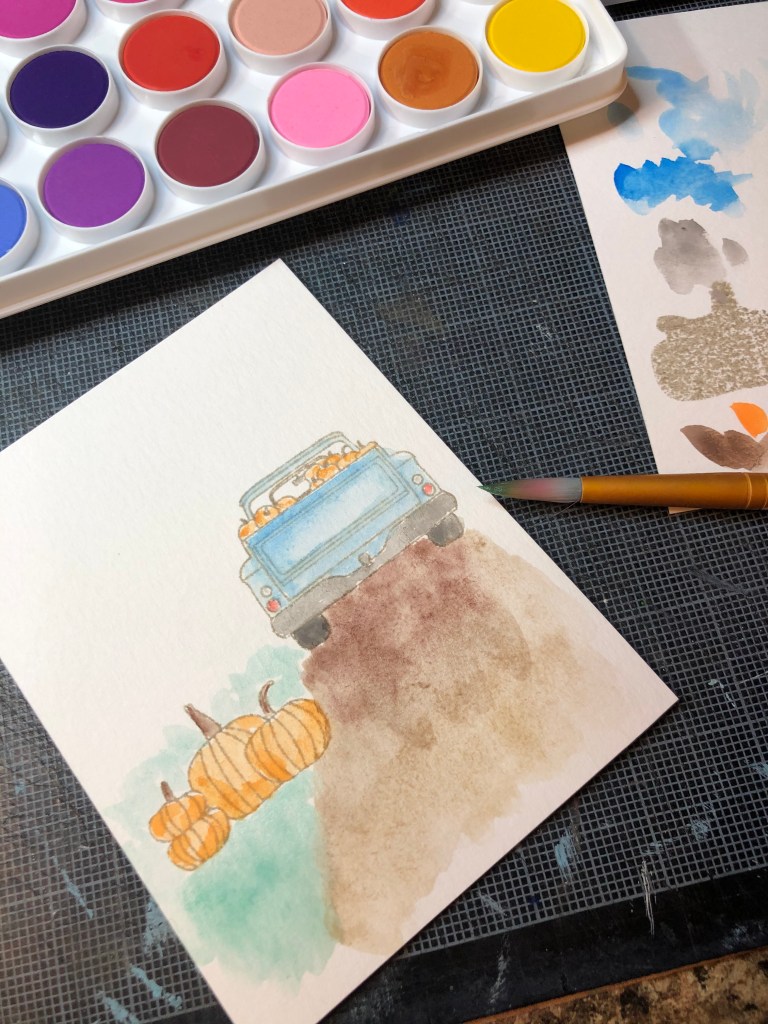
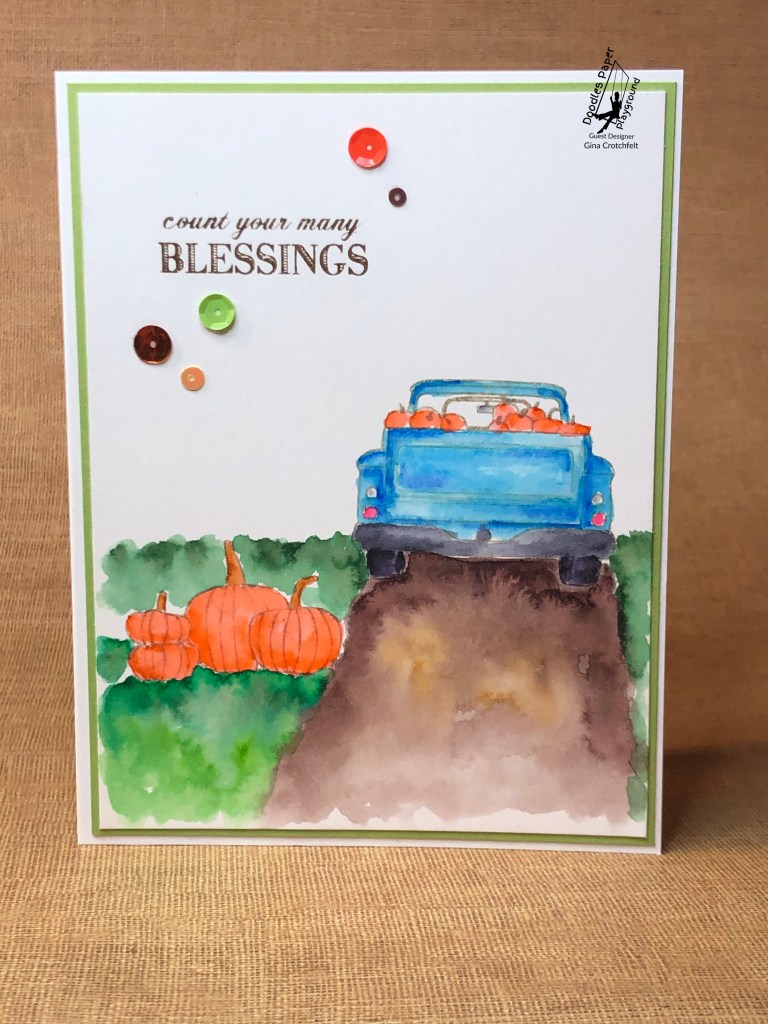
I decided to be fair, I would stamp the same image for each example. I used the Fall Farmhouse stamp set from Simple Stories. To keep the full watercolor effect, I stamped with with a very pale beige color to get the “no line” effect.
For the first image, I used watercolor paper and a watercolor palette I picked up from Close To My Heart a few years ago. Yes, a few years ago. It’s been sitting on a shelf unopened until now. As soon as I pressed my wet brush on the dry watercolor cake, and then dabbed my brush on a piece of scrap paper, it all came back to me. There it went, watery pigment just flowing wherever it wanted. I remembered why this was an unsettling medium for me. But, I persisted. As I always do, I worked in layers. This is a very typical way for me to lay color. I do it with my eye shadow, with coloring, with paper. I think it comes from all the years of working in Photoshop layers every day, but who knows.
I did enjoy some of the soft effects I was able to get for the road and the grass. And, I was able to build up some nice shadows on the pumpkins. But the color is muted and I normally prefer more bright and intense hues.
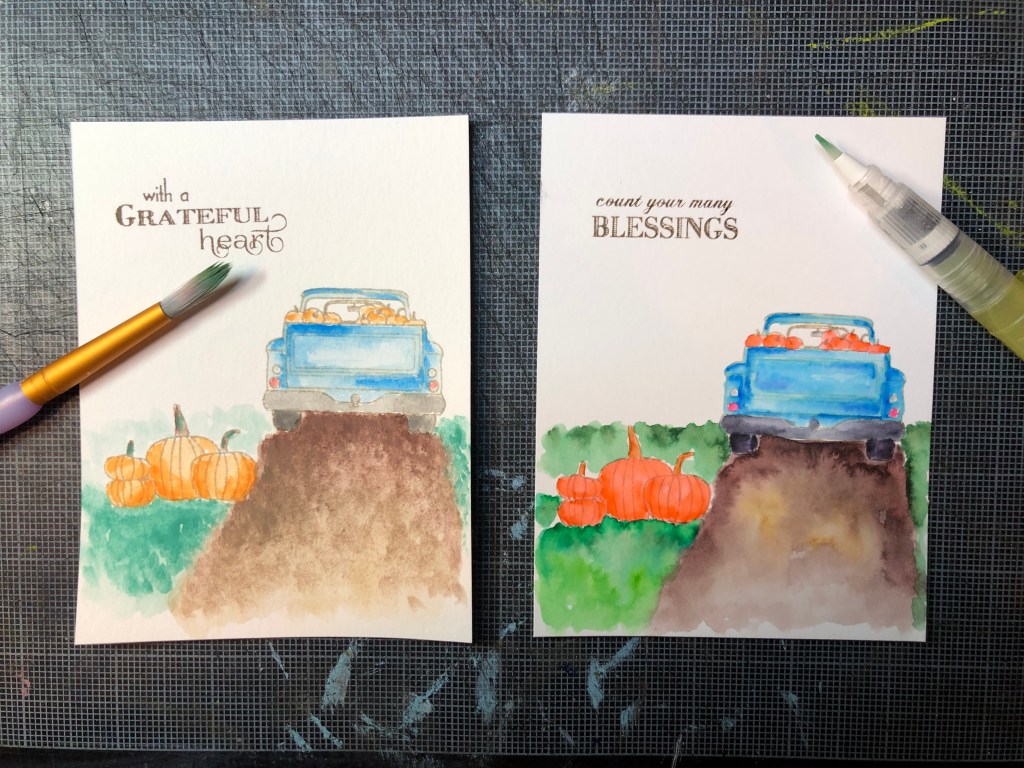
For the next example, I used ZIG Cleancolor markers. I stamped the image on Bristol with the same light shade I used on the previous image. These markers are a very different way to deliver pigment than traditional watercolor paints. For starters, you are working the opposite. With traditional watercolor paints, color is built up light to dark. With the markers, it’s dark to light (at least the way I used them here-there are other ways). I brushed color onto my paper using the markers, then went back in with an aqua brush and spread the pigment. Instantly you can see how much darker and bolder the colors are and how differently they blend together.
Although water is the main catalyst for both examples, you can see how very different the effects are. When placed side by side, I decided for this image I preferred the traditional watercolor paints. I surprised myself. I did try to pick colors for each example that were comparable, but there was no doubt that ZIGs delivered a much more saturated hue. I also feel the ZIGs were easier to build up the color.
Since the first example was so muted, I mounted it on a paler shade of cardstock before adhering it to a card base. For the second, I chose something a little brighter to coordinate with the look. I used sentiments from a stamp set by Maymay Made It called “Blessings.” Once all the layers were mounted, it still felt like it was lacking interest so I added some bling. I used sequins from Doodles Paper Playground’s “Autumn Harvest” Sparkle Blends. This mix has some adorable leaves, fruits and pumpkins, but I kept it simple and just chose some of the various sequins to add a little interest around the sentiment and create some balance in the composition.
I hope you enjoyed reading about my process as much as I enjoyed sharing it. If you’ve tried either of these mediums (or both) let me know how they turned out. Tell me what your favorite was but only do this if you plan to make stuff and be happy.
Hey crafty friends, welcome to another installment of my cheesy headlines! LOL! I couldn’t help myself, I’m just too excited for this cuteness. I’ve been hoarding these adorable Monster stamps from Bo-Bunny for awhile now so I was so excited when Doodles Paper Playground’s amazing September release included this crazy cool Monster Mash blend.
Next I embossed the monster with white embossing powder on white watercolor paper. I took out my color bursts in blue and purple to match. I sprinkled them all over the paper then spritzed with water. I love the effect they create. Once dry, I fussy cut the monster then used an exacto knife to cut out his tummy and built a shaker element. The sentiment was also heat embossed right onto the spooky sky background.
This was a quick card with some really funny techniques. Using colorburst instead of colring the monster with Copics or Zigs saved a lot of time and made a nice effect that played well with the background. I hope you like it and give it a try. Don’t forget to share your creations and enter to win a gift certificate. Thanks for stopping by. It’s the weekend to hopefully you will find some time to make stuff and be happy.
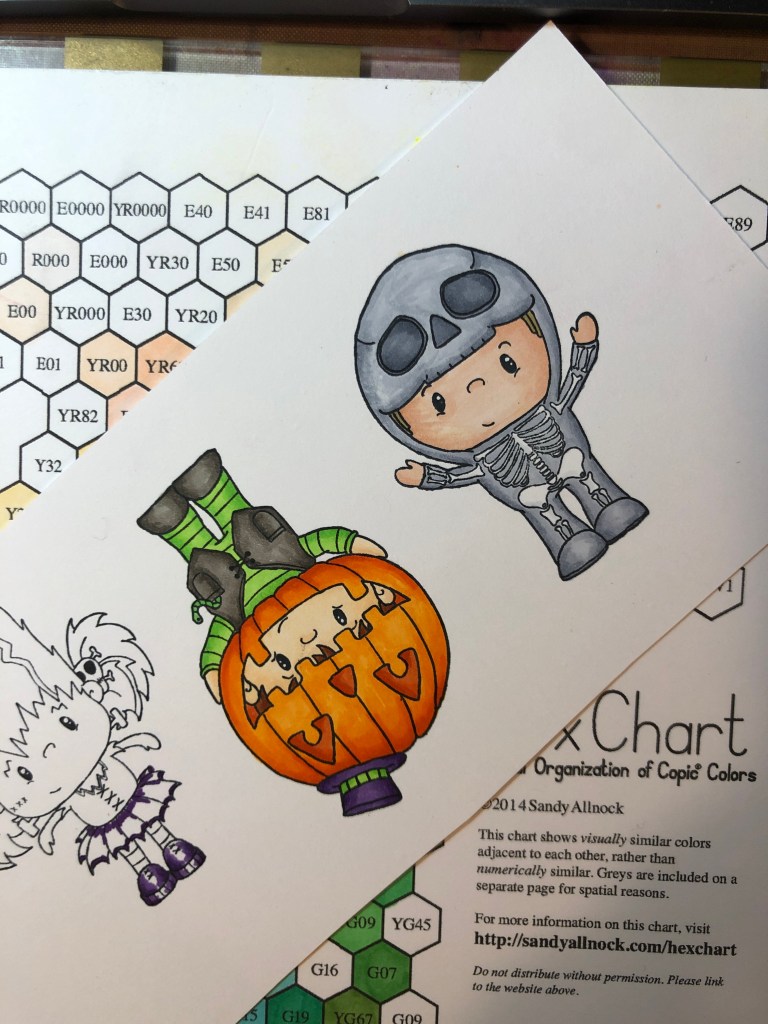
…can often go awry, as I recently learned. Hello again my crafty friends. Halloween is soon upon us and I couldn’t be more excited! I’ve been thinking about Halloween projects all summer. I recently purchased 3 adorable Halloween character stamps and knew they would be perfect for an upcoming design team project for Doodles Paper Playground using the latest Halloween Sparkle Blends. I had an idea before the stamps even arrived. However the card I ended up with was not it, but I always trust the process.
I spent one night stamping, coloring and fussy cutting the characters. I stamped them in black Memento ink and used various Copics. I also did some highlights and sparkles with a few Wink of Stella glitter pens and a silver metallic on the bolts of the Frankenstein girl.
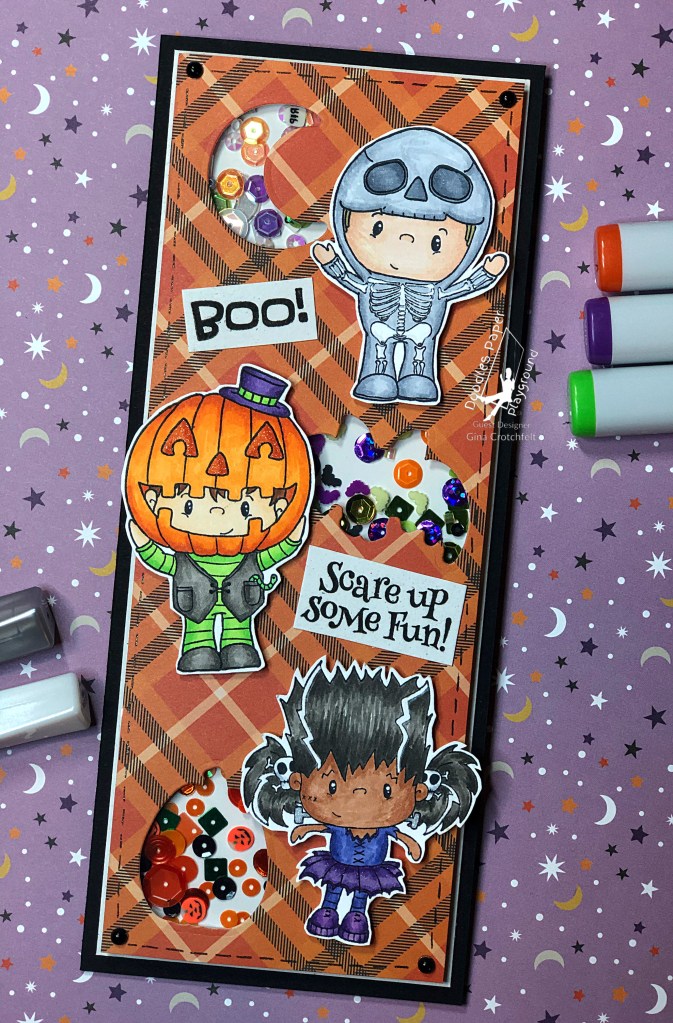
The next night I was prepared to create a spooky background for these cuties using Doodles Paper Playground’s September mood board. I watched a really cool technique on YouTube that I couldn’t wait to try. Unfortunately (although fortunately) the technique worked so good, it was just too spooky. I also realized that all three of these kids would be squished on an A2 card size, so I had to come up with a new plan. I knew eventually I was going to have to cave to the slimline card trend and these cuties were definitely worth it.
It seemed the best (and most fun) way to showcase these three. So I had some fun with the shaker windows. Originally I was going to do circles or squares but I didn’t have any dies small enough. Then I came across the fun shapes in my Halloween stash.
The other bonus with the slimline is it allowed me to showcase more than one Sparkle Blend, which is awesome because it would have been really difficult to choose. The moon is filled with “Spectral,” the bat has “You Make Me Batty,” and the pumpkin is filled with “Jack-O-Lantern.” If you take a close look, you’ll see there are so many cool elements in all these blends that can even be pulled out and used as individual embellishments.
Once the layout was complete, the card felt like something was missing. So I finished it off with black faux stitching using a fine line black glitter pen made by the same company that makes Copics. I pulled this one out of my stash recently and forgot how fun it was and how smooth it writes. I finished the corners with black epoxy dots. The last thing I did was add the sentiments. I will be honest that there was a bit of a learning curve using the slimline layout, but I am always up for a new challenge and welcome anything that pushes me outside of my comfort zone. It definitely lends itself to different design opportunities than a standard A2 card. If you have created a slimline Halloween card please share with me! And as always my crafty friends, make stuff and be happy!
It’s getting closer…it’s definitely nearby. School is starting. Temperatures are getting cooler. You know what it all means. You’ve seen the pumpkins sneaking out everywhere, whether in site or smell. We are a week into September and I am ready for…Halloween!!!
Lucky for me, Doodles Paper Playground’s September 2020 release is full of spooky, Halloween goodness! With so many different blends it was hard to choose. Luckily, I just received this stamp set so I was ready to go!
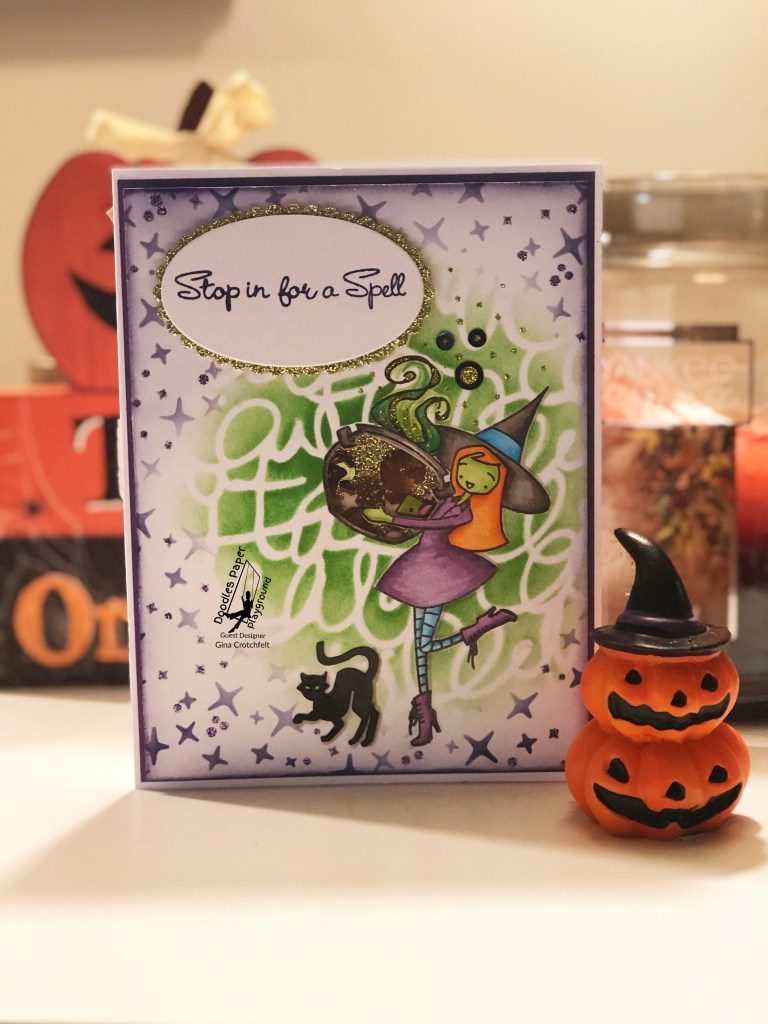
This spooky cutie is called “Bewitching” from My Favorite Things. I colored her with Copics then masked her so I could make the background. The background uses two different stencils and inks from Catherine Pooler. The cauldron was perfect to make a shaker window showcasing the “Wicked Brew” Sparkle Blends. But that’s not the only place I was able to use them. Wicked Brew had the perfect shapes for cauldron bubbles. I added some Stickles to them so they looked like they were bubbling right out of the pot. And that’s not all! Check out the cat. He is also a shape in the Wicked Brew Blends. How perfect is he!
This is just the beginning. I have many more fun projects planned for all the new blends. Stay tunes and in the meantime, go check them out. These are definitely selling fast! Thanks for stopping by and don’t forget…Make stuff and be happy, my friends!
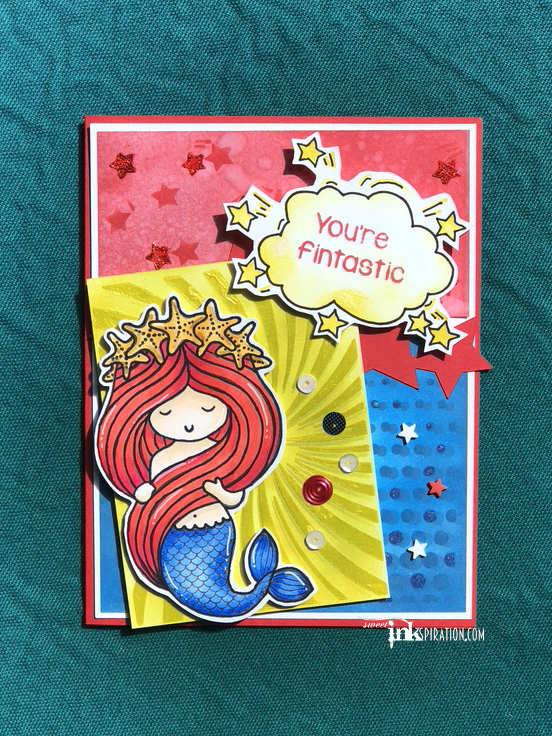
If you’ve been to my blog or you know me IRL, then that headline needs no explanation. If this is your first visit to my blog, Welcome! I love mermaids.
This lovely lady is from an amazing company called Sassy & Crafty. If you’ve never heard of them, leave now! Nothing on this blog is as awesome as what they have! Trust me.
This is my second card using her. You can check out the first here. This is one of those sets that instantly inspired me with so many ideas. So you know that means there are more coming! For this one, the stars on her head made me think of Wonder Woman, and since Sassy & Crafty has these amazing comic book stencils, I just had to.
I had so much fun playing and creating this action packed fin flapper. Each segment of the background was created separately using different pieces from the Comic Book Stencil #1 and Comic Book Stencil #2 sets. All of them used one color of Distress Inks. I blended the background and then used the same color on top with the stencil. On the red, I added Brutus Monroe Scarlet Glitter Glaze on some of the stars. On the yellow I used Picket Fence Studio’s Paper Glaze in Daffodil Yellow. And, on the blue I used the stencil twice, moving it slightly to create the dots. Then I went over some of the dots with Nuvo Glitter Marker in Imperial Blue.
For my friend Shelly, I colored her with Copics. I added Wink of Stella in Clear to her hair. I used glitter gel pens on her star crown and fins and lastly added some highlights with a white pen. For the sentiment bubble, I used the stencil with yellow ink, then outlined it with a fine tip black marker and cut around it. The final touch was stars and sequins from Doodles Paper Playground’sStars & Stripes Sparkle Blend. These days, it’s hard for a card to feel complete to me without a touch of a blend.
I hope you enjoy Wonder Merwoman in all her sparkly glory. Stay tuned to see how she disguises herself next and give me a shout if you have any suggestions! In the meantime, don’t forget to Make stuff and be happy!
It’s true. Summer is almost over. The one I thought would never end is doing just that. But before it goes, I needed some bright and sunny designs to keep summer a little longer. Luckily, Doodles Paper Playground had some Sparkle Blends to do the trick.
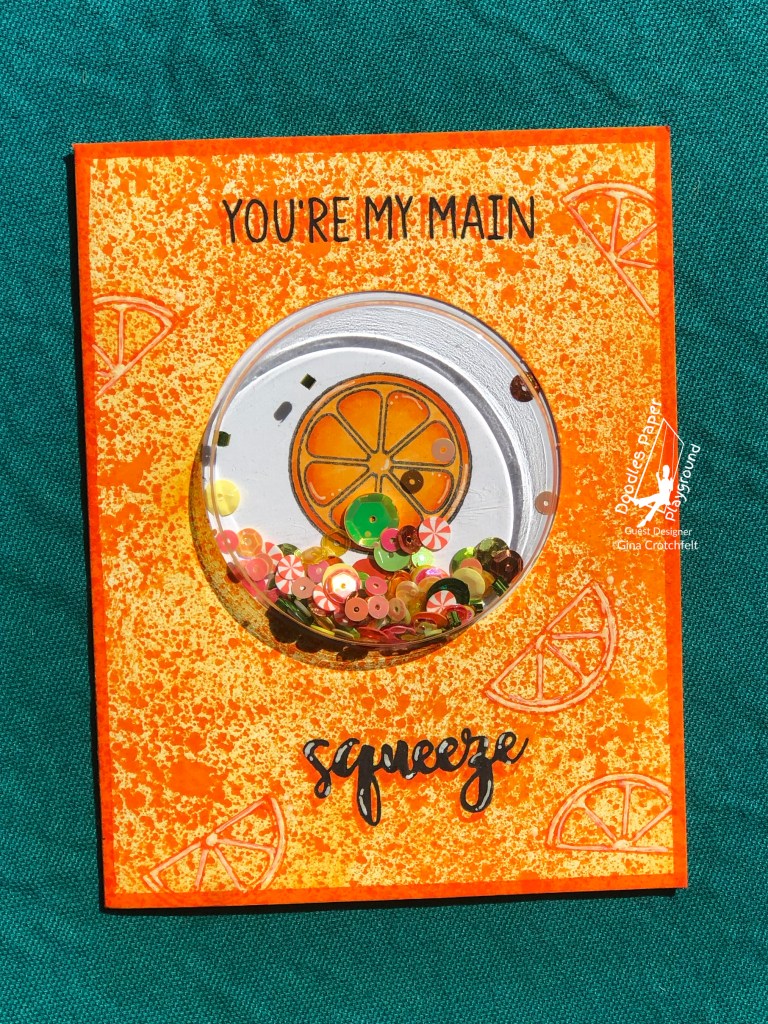
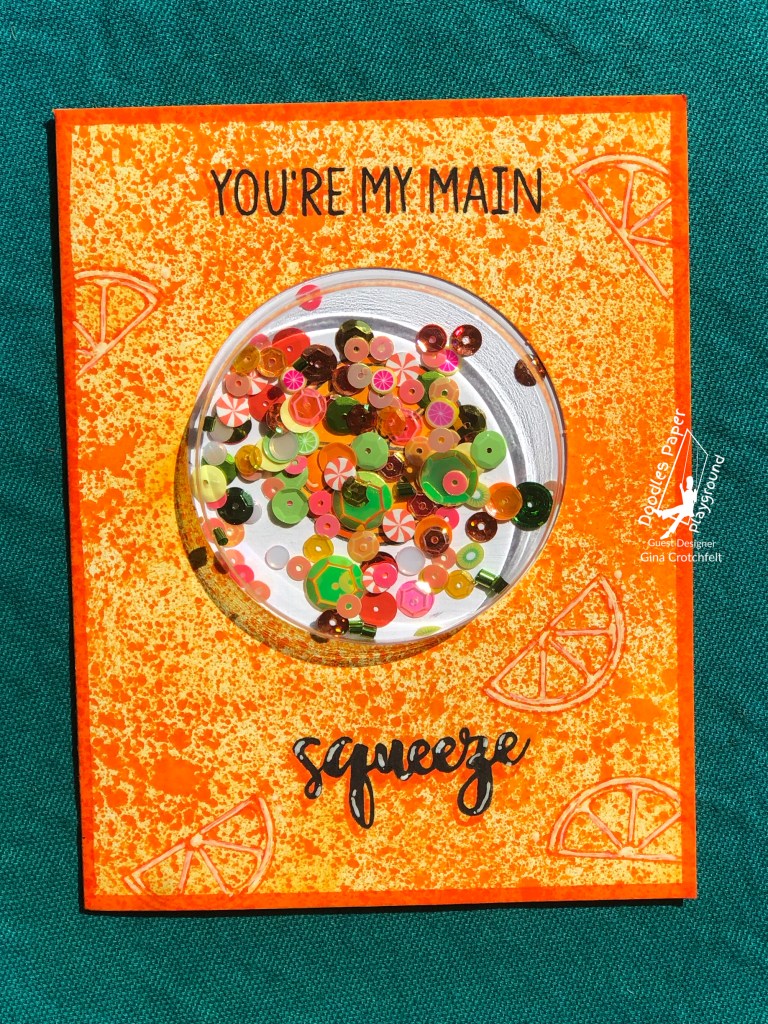
This is what I call a “cheater shaker.” It’s the first time I used one of these pre-made shaker cards and I did not love it. The biggest reason being the shaker is way too deep if you plan on mailing the card. However, it would be great for some of the Sparkle Blends that have bigger elements. Secondly, the adhesive on the plastic shaker part is on the wrong side so I had to glue it. Doesn’t make sense. But I still had fun with this delicious card, especially making the background. I used Spiced Marmalade Distress Spray for the first time and it was so much fun! I will definitely be playing with sprays more in the near future. I filled in the sprayed background with Sauna ink from Catherine Pooler. I used the “Fresh Squeezed” stamp set from Kindred. The orange in the shaker was colored with Copics and the slices on the background were stamped in Orange Twist ink from Catherine Pooler. I also used Orange Twist to stamp a shadow for the sentiments before I stamped them in black. I added some highlights with a white pen. I filled the shaker with Citrus Tornado Sparkle Blends from Doodles Paper Playground.
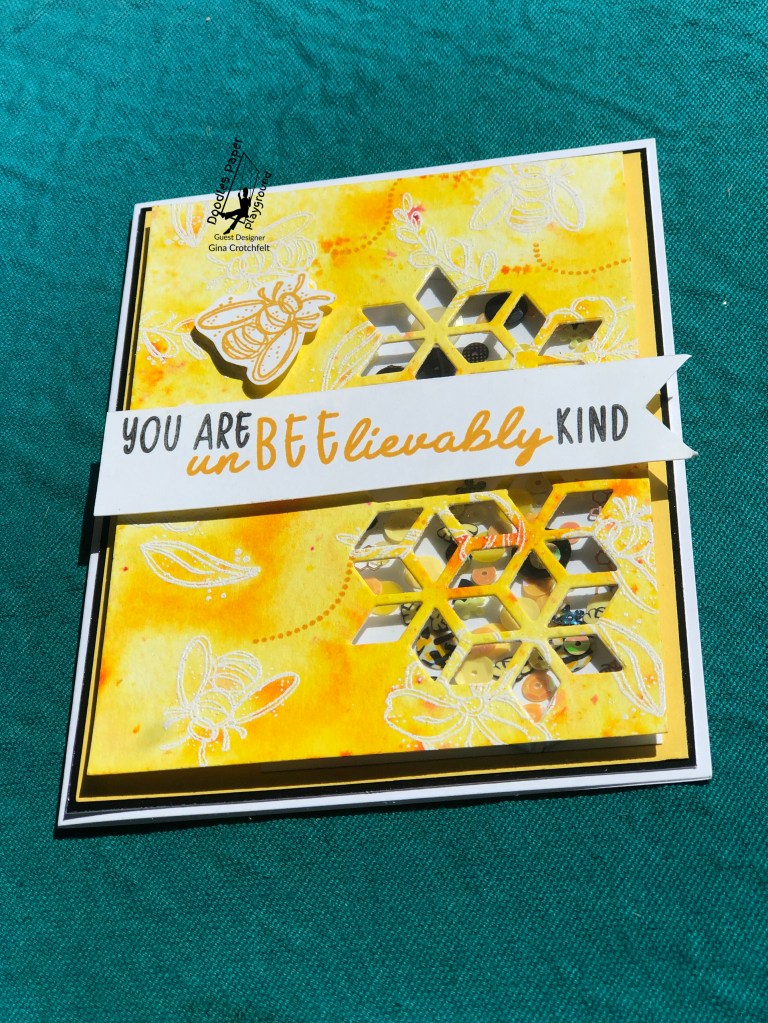
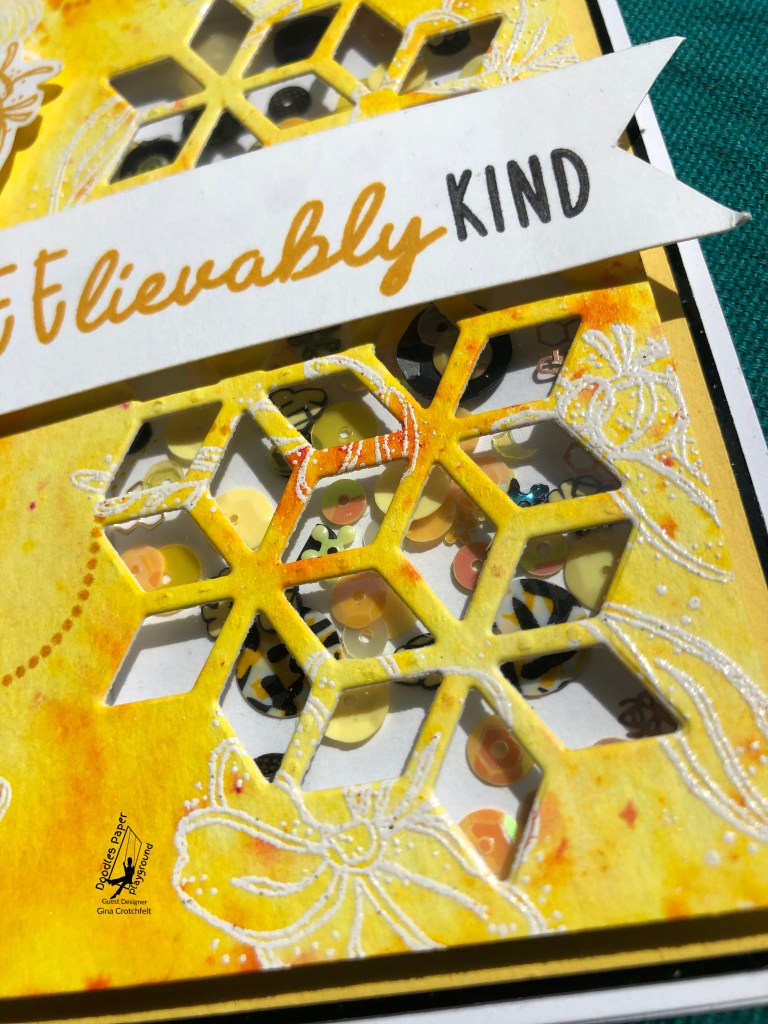
Something else that reminds me of summer is bees. And since I could not resist the adorable Bee Creative blend, I had to find a way to use them. I used a variety of yellow and orange color burst powders for this background, after I stamped the bee & flower images and embossed with white embossing powder on watercolor paper. I used Sauna ink from Catherine Pooler for the yellow sentiment. Stamps, dies and paper are from Stampin’ Up.
So school starts soon and summer will be winding down. I can’t lie, my mind is already moving to Halloween so stay tuned to see what’s next! And don’t forget to Make stuff and be happy!
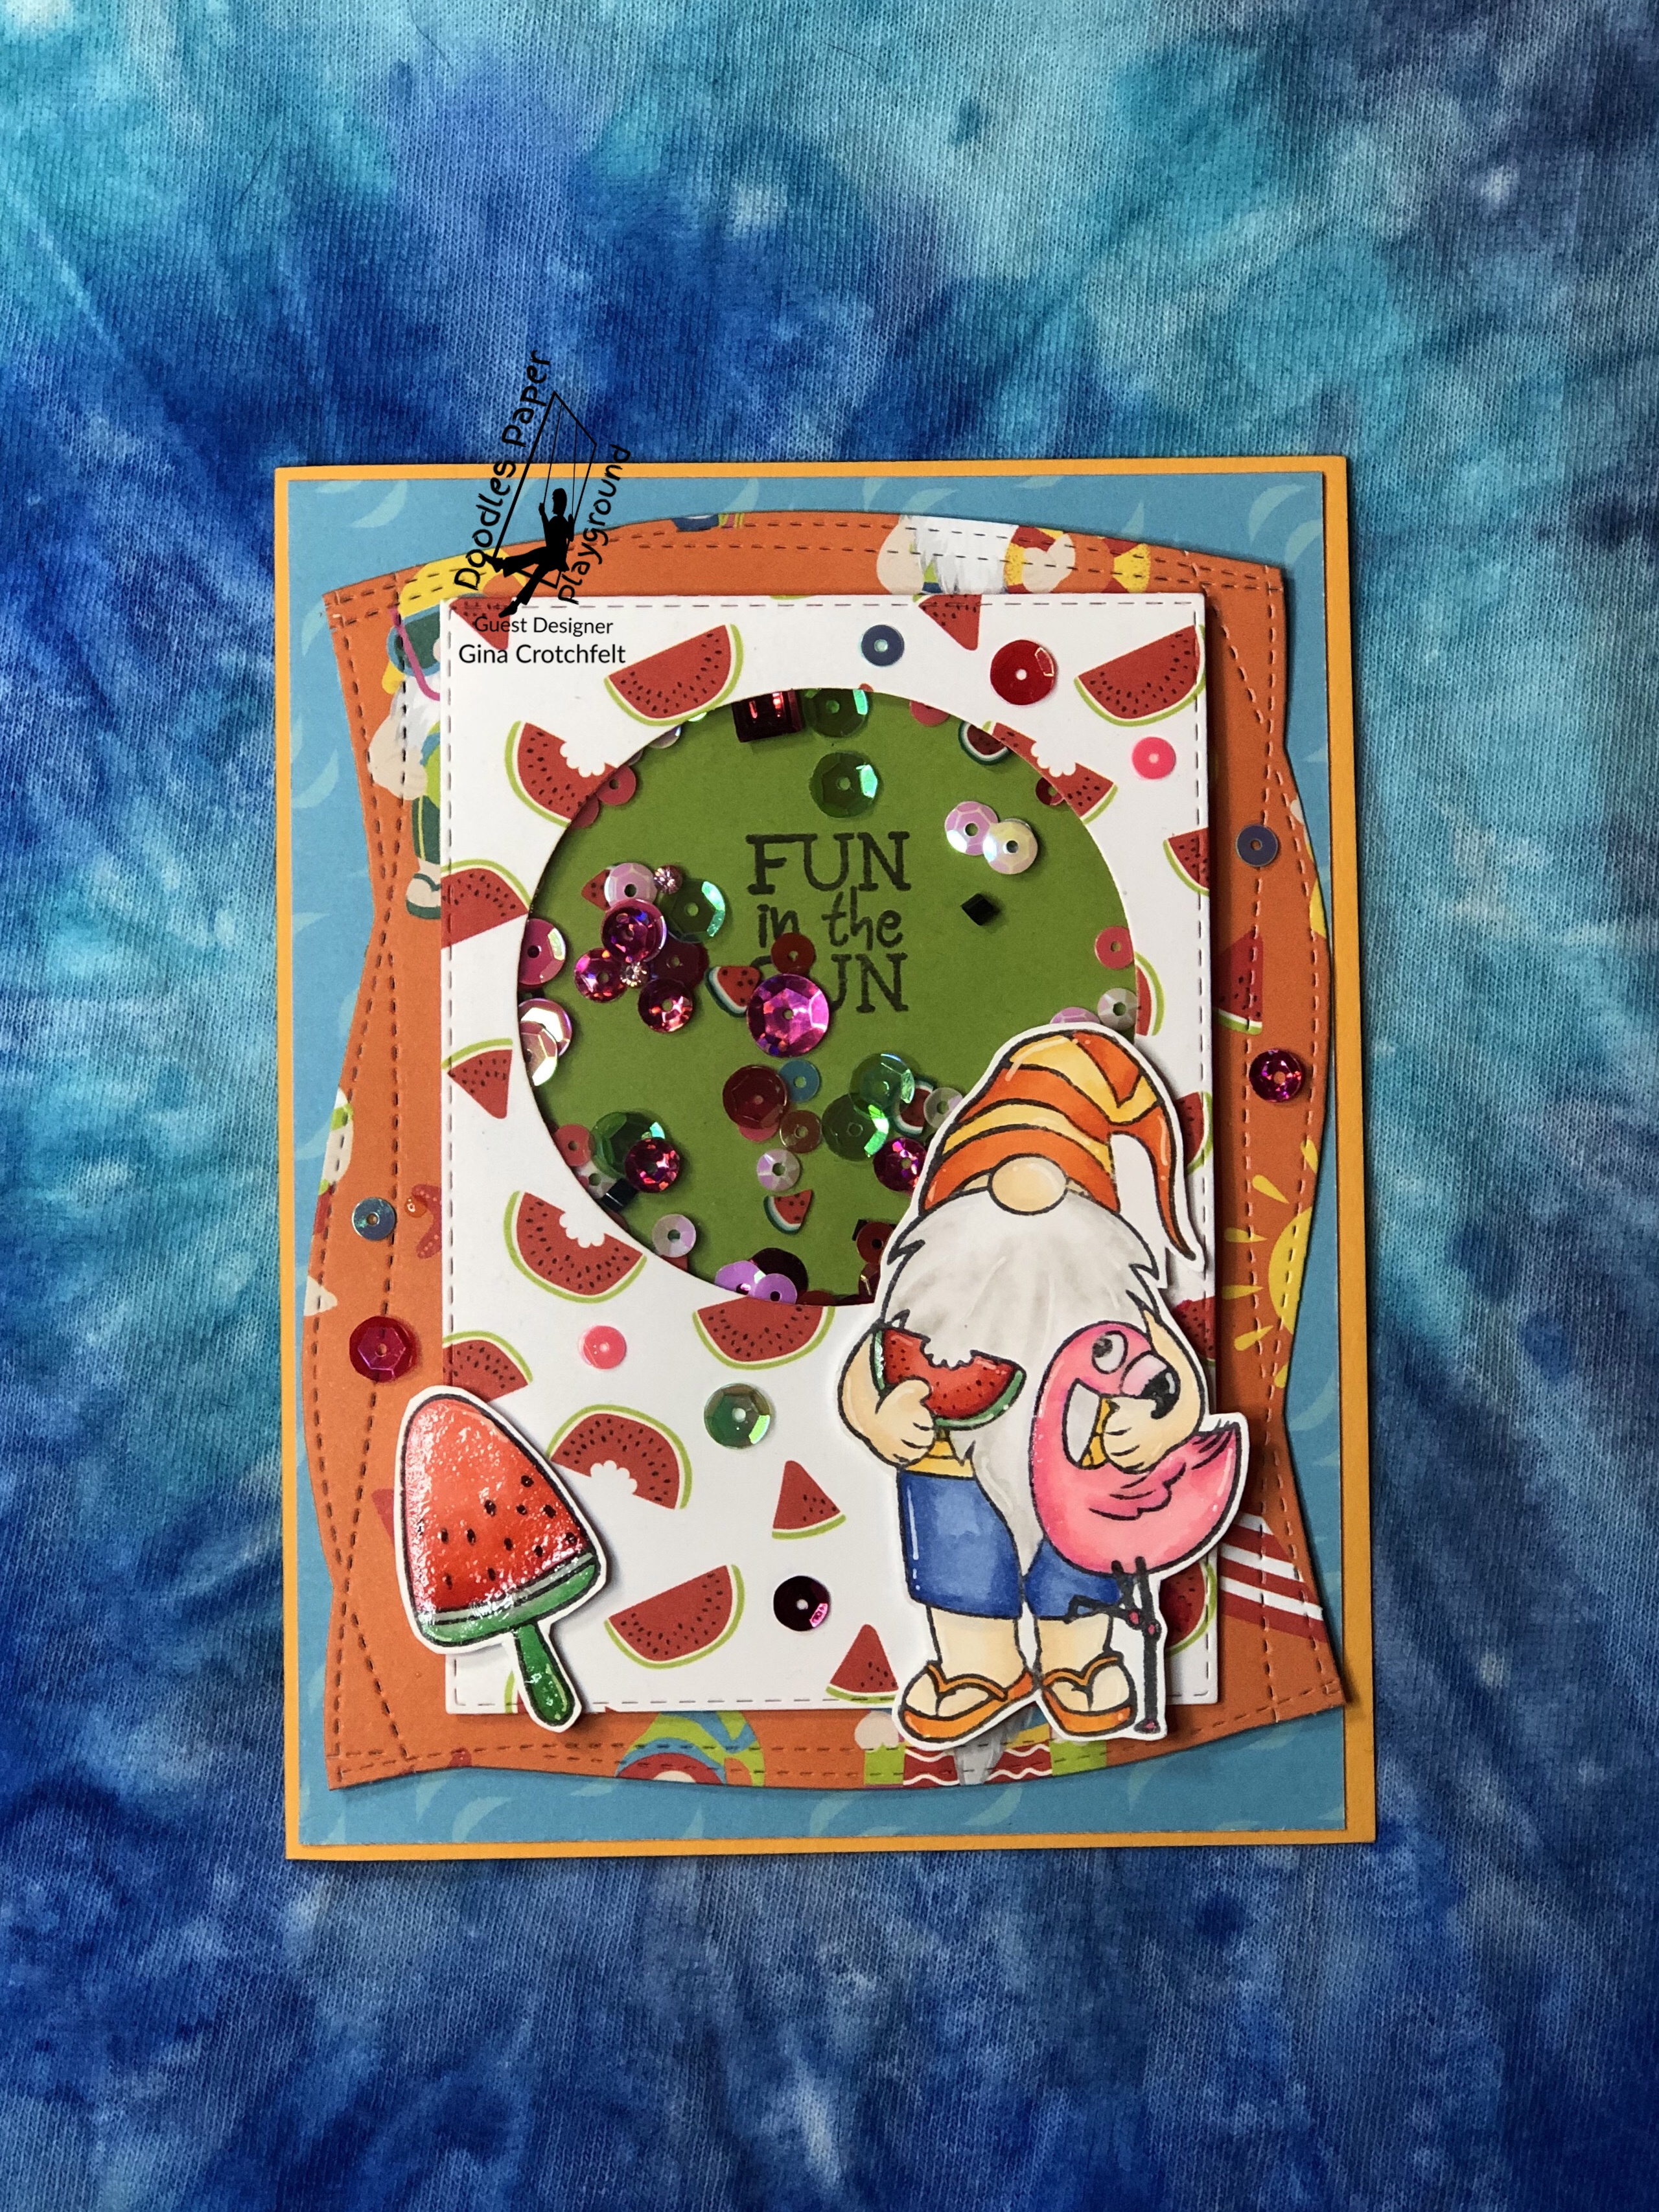
It’s true. I’m obsessed with gnomes. I love them and I’m not afraid to admit it. I look for any excuse to use them. So when I saw a piece of watermelon in this guy’s hand, I knew what to do! He was a perfect match forWatermelon Sparkle Blendsfrom Doodles Paper Playground. The stamps and paper are all from the “Tula & Norbert Excellent Adventure” by Photoplay. All these elements combined allowed me to create a card that was a tribute to the final drops of summer before we being Fall’s adventure.
This was a tough design because the set had so many awesome papers, I wanted to use them all! But of course, I chose the watermelon paper to match the Watermelon Sparkle Blends. I also had fun with some new stitched edge dies from Simon Says. Coloring the pieces was (of course) my favorite part! I used Copics, a white pen and glossy accents on the flamingo and watermelons. I loaded the shaker with the blends and it all came together.
Together with the Doodles Paper Playground design team, I am participating in the August Sparkle Blends Release Inspiration Blog Hop! There are 12 amazing new Sparkle Blends in this release & I am so excited to share some of them with you! Make sure you head over to the Sparkle Blends Shop & check out Pizza Party, Kiss A Lot Of Frogs, Pineapple Garden, Watermelon, Use Your Emoji-nation, Wonderland, Flutter By Butterfly, Grown Up Grape Juice, Bee Creative, Baby Shark, Citrus Tornado, & Ladybird. If you act quickly, there are even a few discounted release bundles left for order that include 2 FREE gifts & you will receive a pack of Glow In The Dark Bubbles with every order of $10 or more (while supplies last)! Want a chance to win one of 6 awesome prize packs? Make sure you leave comments on all blog hop posts! Comments must be posted no later than 11:59pm Eastern on Sunday, August 16th 2020. See the Doodles Paper Playground Hop Post for additional prize info, giveaway rules and entry details! Use Coupon Code: AUG15OFF to take 15% off your total order. (Excludes August Release Bundle. Can not be combined with other coupons or offers. Can not be applied to previous Purchases. Offer ends August 22nd, 2020.)
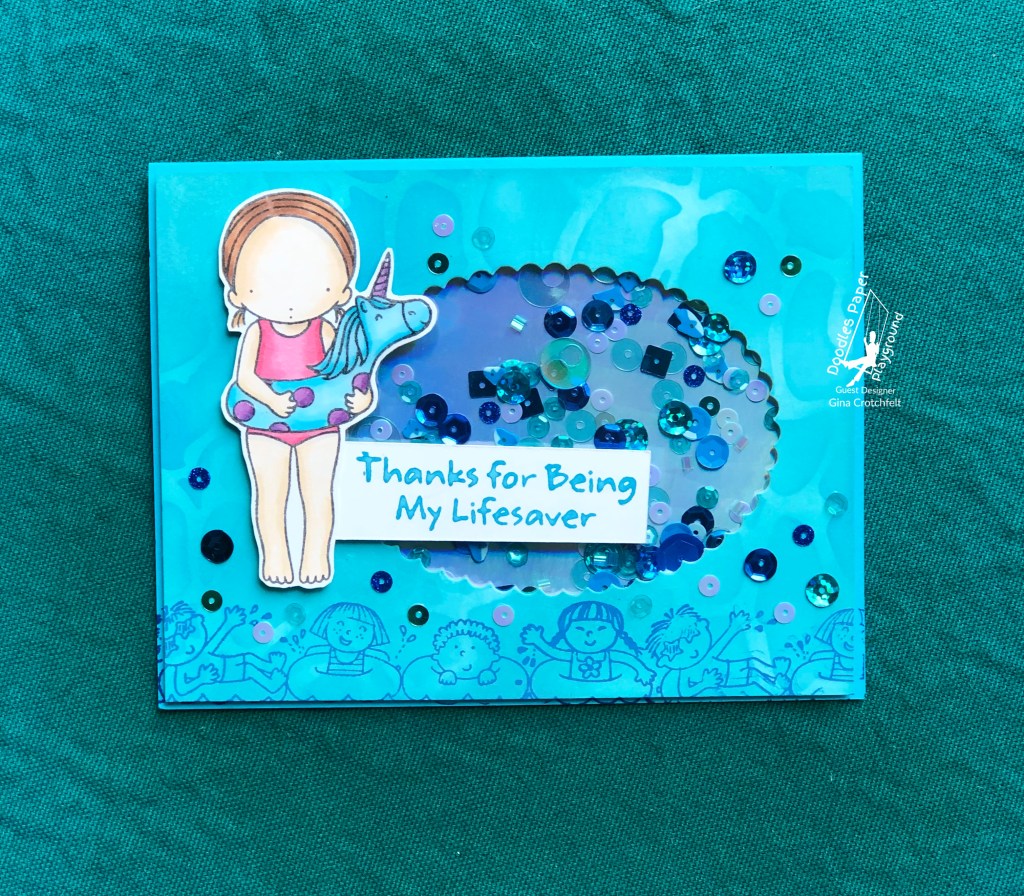
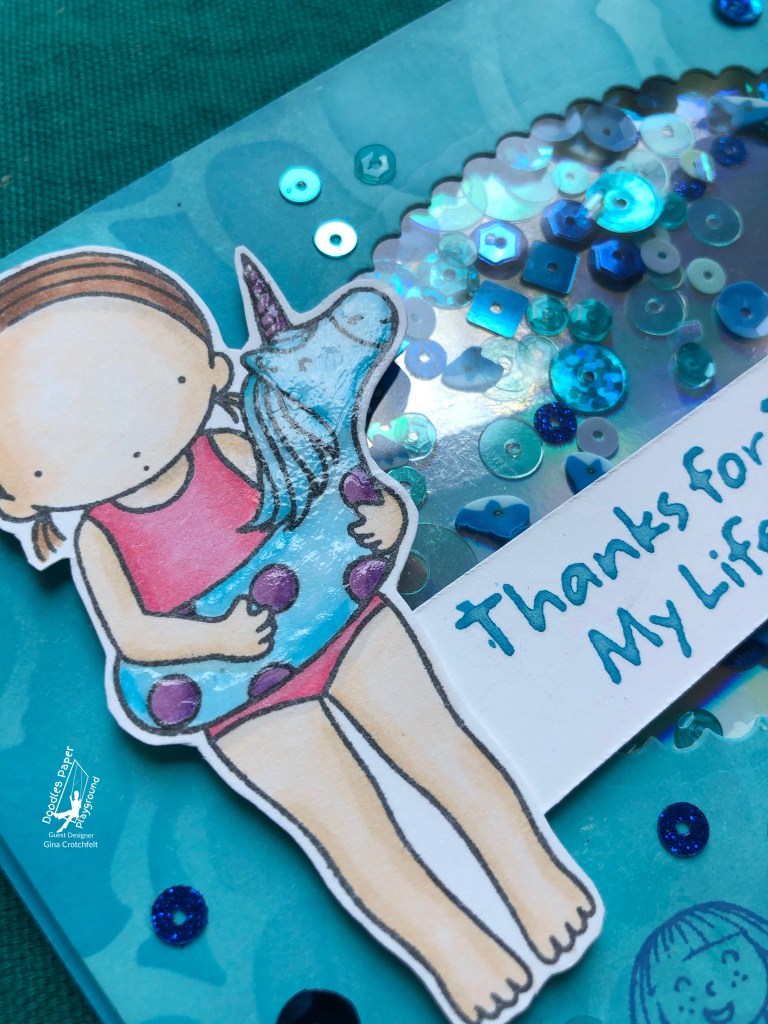
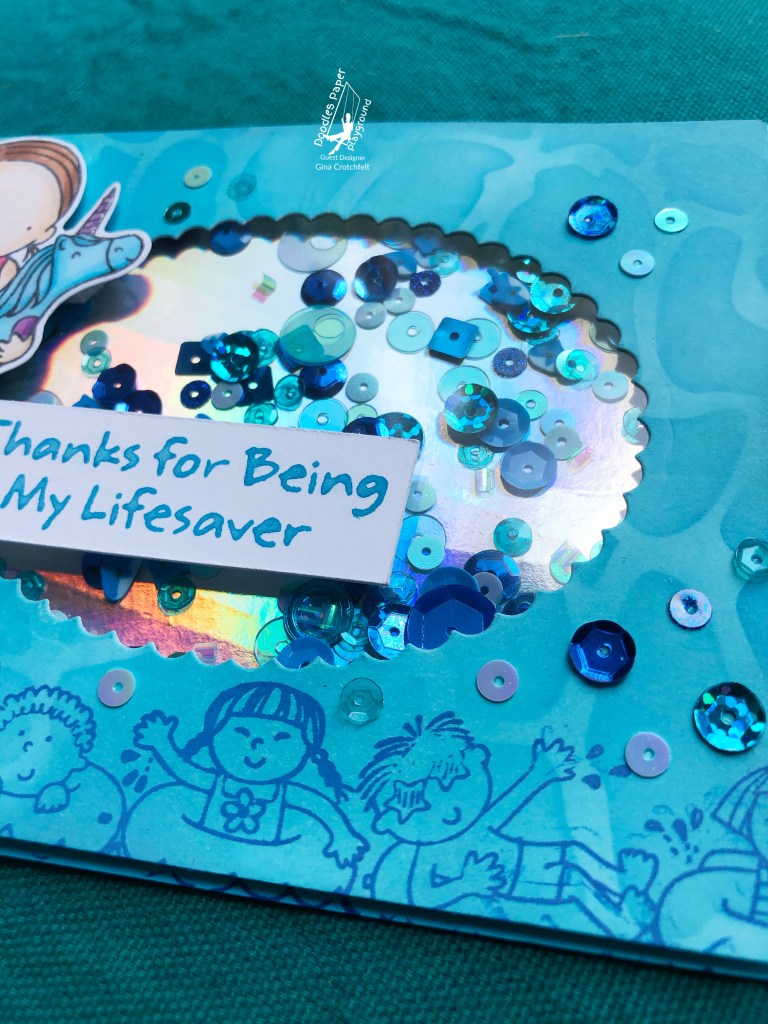
I’m holding onto the last bits of summer with this fun card using “Baby Shark” Sparkle Blends. Check out the close ups to see the cut little clay sharks and beautiful, sparkly shades of blue. I found this amazing water stencil from MFT, although I think I still need to practice with it. Stamps are also from MFT. I found the fun holographic paper at Dollar General, of all places!
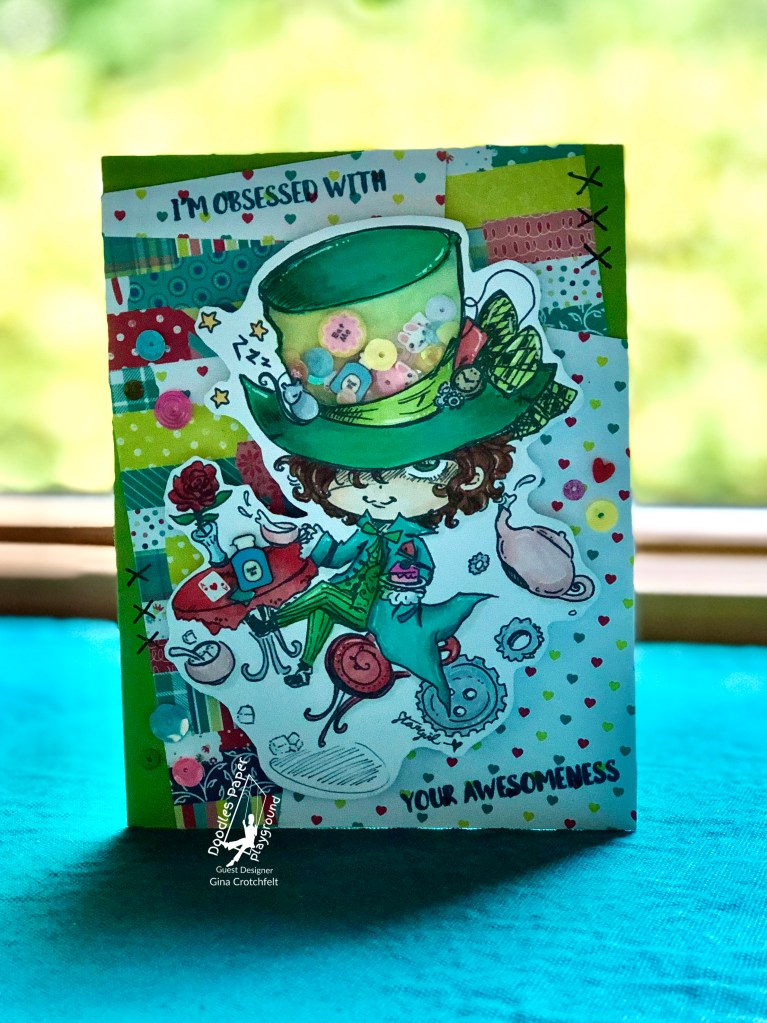
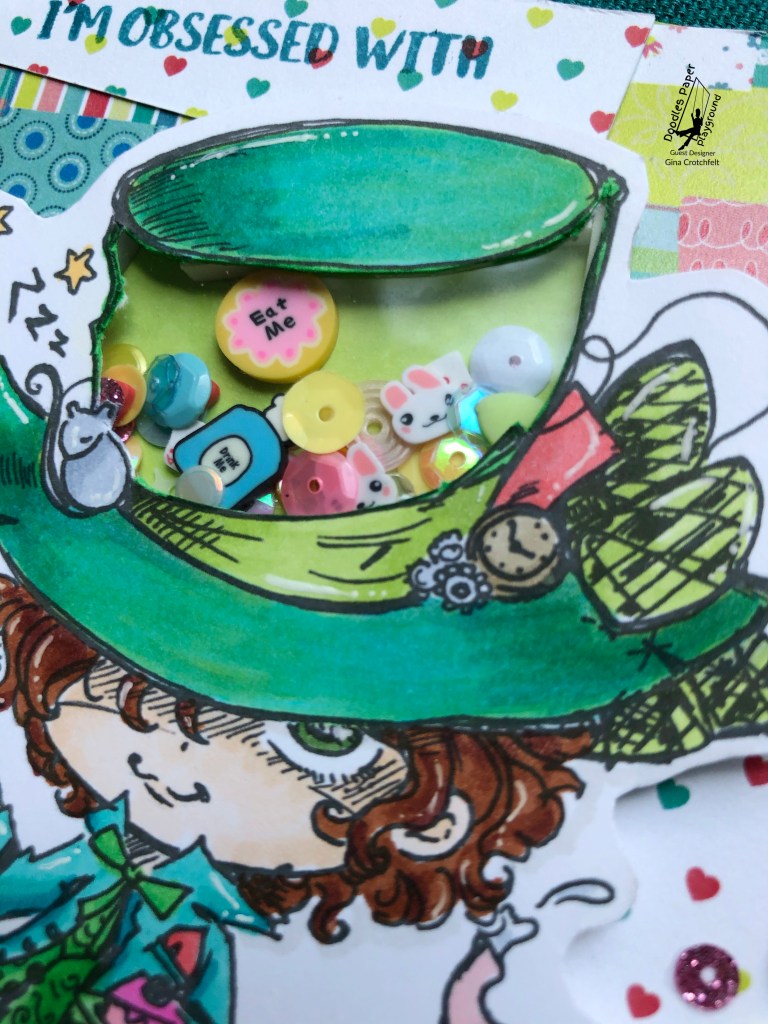
There were so many amazing blends to choose from this month, I couldn’t pick just one. How fun is “Wonderland?” Even if you are not an Alice in Wonderland fan, there are so many gorgeous elements in this blend. I used a digi stamp from Star Stampz along with Photplay paper and a sentiment from Picket Fence. Take a look at the close ups to see all the different shapes and colors in this blend.
Don’t forget to visit the rest of the Hoppers to see some amazing projects!!
Hey, thanks for stopping by! I’m so excited to share one of my creations using a fabulous new Sparkle Blend from Doodles Paper Playground. Sparkle Blends are one product that fuels my creativity and provides endless inspiration. With this huge August release, all the themes are amazing and the possibilities are endless.
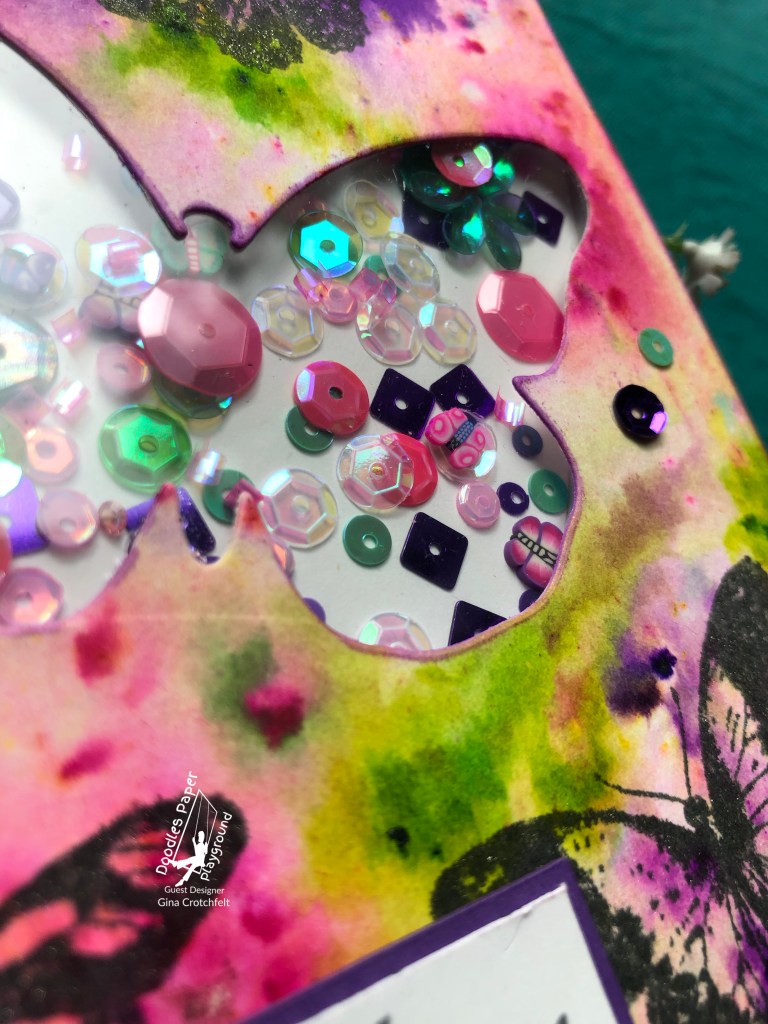
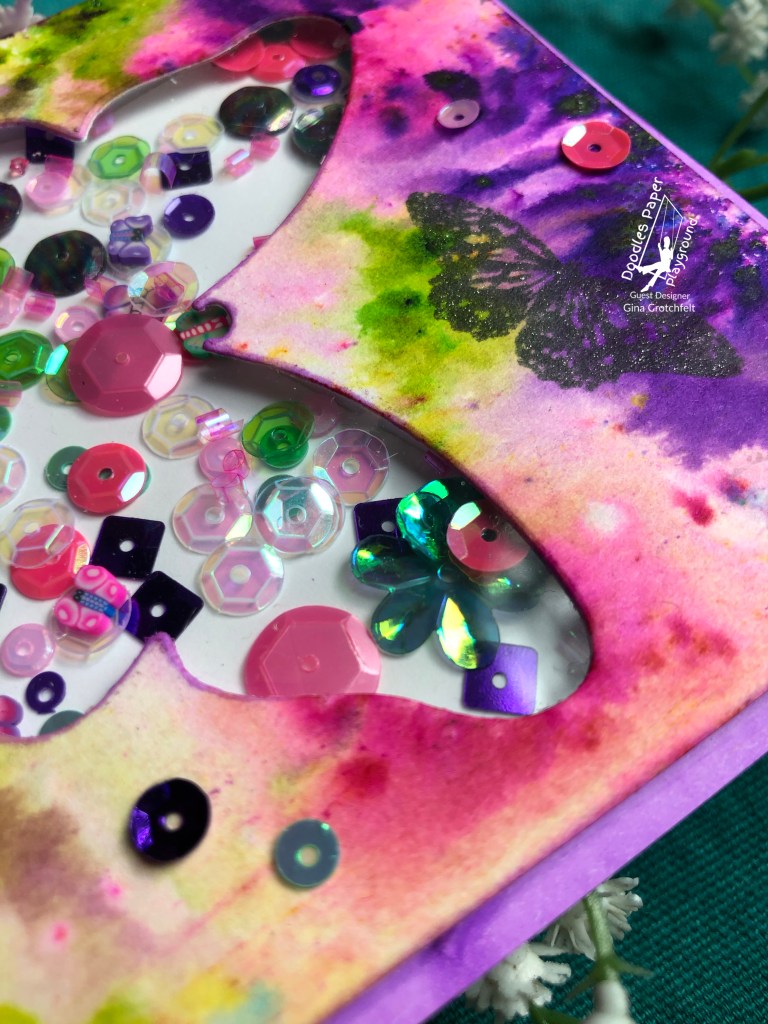
So, for my first act I present “Flutter By Butterfly.” This blend fueled all the decision making in this card from color theme, shaker shape to which medium to use for the background. I wanted to create movement, or a flutter of butterflies, like the name suggests.
The background was created using color bursts on water color paper, one of my absolute favorite products to create backgrounds with. The butterflies were stamped with my favorite off black ink from Catherine Pooler, Black Jack. Of course this needed some glitter so I covered the butterflies in Clear Wink of Stella.
And the final touch was an awesome trick I learned from Alison Heikkila. My shaker base was on white cardstock but after everything was placed and adhered, I changed my mind. The base needed color but this was beyond pulling apart with Undue. I would have ripped the shaker element apart. So, remembering a trick Alison did on one of her lives with an ink pad, I tried something similar. I took a Copic marker and colored the white border around the shaker base purple. That changed the entire look of the card and really made it pop! The color accented the blends perfectly.
Here are some close ups of the “Flutter By Butterfly” Sparkle Blends. The colors are gorgeous, but look closely at all the different color butterflies. Thanks for stopping by today. Don’t forget to make stuff and be happy.