0

Welcome to the (rainbow) jungle

Welcome to the jungle, we got fun and crafts! And my heart is swinging with all the new wild products from the Safari release. For this card, I decided to throw it back to one of my favorite designers from my childhood. 

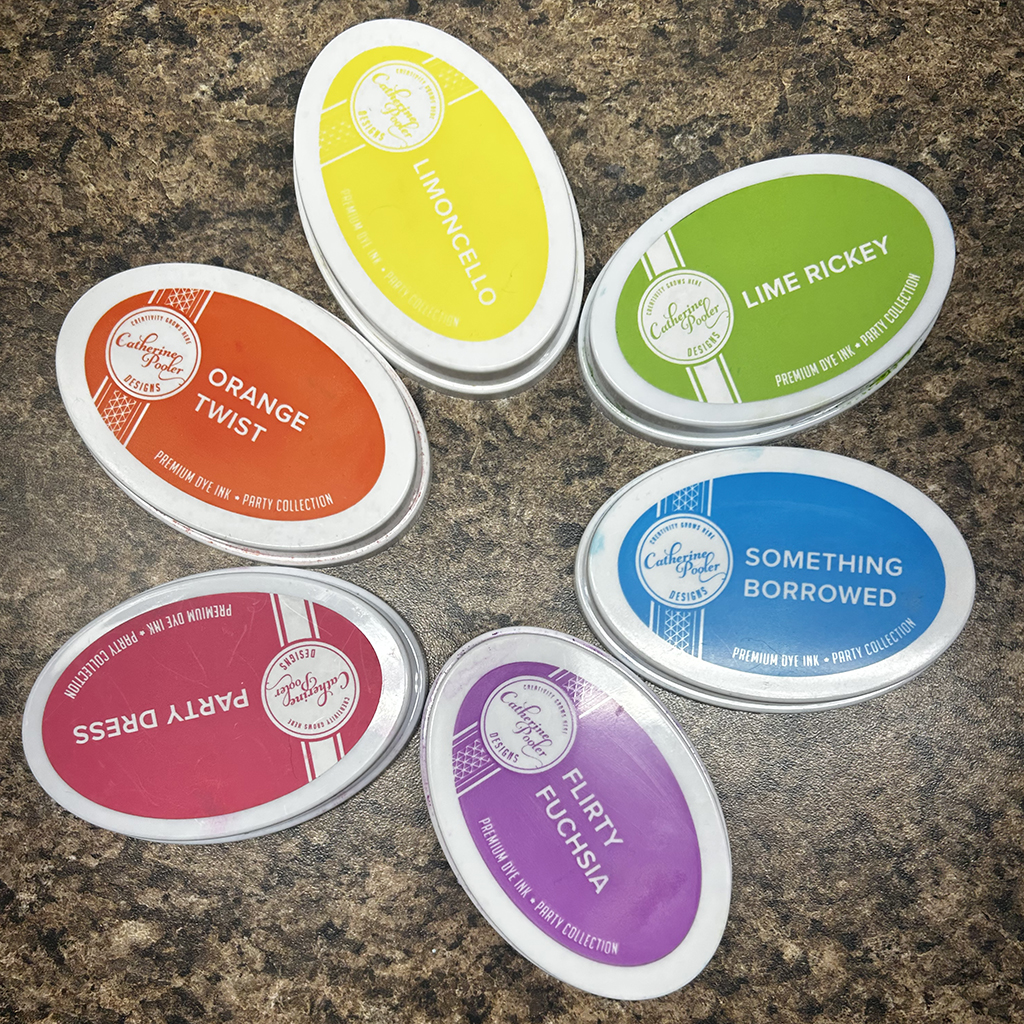
I started the background by blending a rainbow of colors across the panel using Catherine Pooler inks.

Then I used the Safari Spots 4X4 stencil with blank ink, right over the rainbow. To get the continuous pattern across the card front, I flipped the stencil to make a mirror image, be careful to not make a seam. I did it in a spot that I knew would be covered. 

I used the lion from the May Die of the Month “Wild Things.” I spread Teal Candy Coat on white cardstock. Once dried, I used it to die cut the mane and the tail. I used some Fabulous Fibers behind the lion and attached him to a black scalloped oval with foam tape. The sentiment is from the “Wild and Free” stamp set. I thought the rainbow was a cute touch to connect the focal image to the sentiment. The rainbow is from the “Be Happy” die set

Since I created this on a black card base, I put a piece of white cardstock on the inside. To give it some interest, I stenciled lightly around the edges using whatever ink was left on my brushes from inking the background. 

If you would like to see the replay of the YouTube live when I created this card, you can view it here.

For more crafty inspiration using my favorite Brutus Monroe products, follow me on IG: @sweetinkspiration_byginac 

0

Dive into Summer

It’s time to dive into summer with the new “You Are My Sunshine” summer release! Dip your toe in the pool with these adorable frogs from the “Froggy Fun” stamp set. 

To make the base of this card, I cut off 4.25″ X 3.25″ from the top half of the front of an aqua colored A2 card base. I started off by using the new “Water” die to make the background. This is a 4″X4″ stencil perfect for creating an overall pattern. I used a blending brush with aqua colored ink and blended small, overlapping sections all over a piece of white 4″ X 5 1/4″ Perfect Blend cardstock until it was covered. By overlapping, this makes the water look like a shimmering pool when the sun hits it. I adhered this to the inside of the card. Then I placed a 3.75″ X 1.75″ piece of white cardstock at the bottom. 

To create the “deck” on the front of the card, I cut 15 pieces from the Fence Builder Die.  I attached them to the front panel, placing them slightly higher, so they overlapped the edge as seen in left of the photo above. 
All the images were stamped with Raven Detail ink and colored with alcohol markers. I attached them all to the card with foam adhesive. For a final shine, I used glossy accents in various spots. 

To see a live replay of how I created this card, go here

For more inspiration and fun projects using new Brutus Monroe items, follow me on IG at @sweetinkspiration_byginac

0

Fall-ing in love again

I don’t know about you, but I had a very hard time letting go of summer. It was a busy summer and I did not get enough time to do the things I wanted to or spend enough time with my family. So I fought it as long as I could. But then enter the September release from Brutus Monroe. Impossible not to love it all and want to dive into a pile of leaves. Now I’m ready for the crisp air, beautiful colors and all my favorite things about this time of year…finally!

This card features several new products from the September release. Starting with the background, I used Chroma Mist sprays on glossy paper for a different effect. This is one of my favorite things about Chroma Mists – depending on what type of paper you use them on and how much or how little water you add – the outcome is always different. It’s easy to create all different looks.

Once dry, I used Copper Chroma Glaze with the wood stencil. I love these colors so much. The copper works so nicely with the browns. The flowers are from the “Fall Florals” stamp set. I colored them with Copics, cut them out and inked the edges lightly with brown ink. The “Thanks” sentiment is from the “Fall Favorites” die set. I colored some pink enamel dots with the same copic marker I used on the berries so they would coordinate. So many fun products used to create this fall themed card. I hope it makes you appreciated Autumn’s beauty as much as it did for me!

0

Shiny, happy…

…cardmaking! You do not want to miss this amazing collaboration from Brutus Monroe & Thermoweb! Introducing “Magical Monarchs.” This collection has something for everyone…if you love foiling—and even if you don’t! There’s something for every crafter. It includes stamps, dies, toner sheets and a stencil that all coordinate. And the coolest new product ever…Magical Shattered Glass Foil Transfer Sheets! They are a transparent foil sheet that looks like iridescent broken glass and allows whatever is underneath to show through. But it gets even better…it works with Brutus Monroe Chroma Glaze! That means whatever color Chroma Glaze you use will show through the foil but will have a new, unique look to it. Just like on this orange and yellow butterfly I created.

On this card, I stamped the solid butterflies in Raven Black Detail ink. Next I used the detail stencil with yellow and orange Chroma Glaze. Once dry, I die cut it with the solid butterfly die. I ran it through the laminator with Magical Shattered Glass Foil. The flowers around the the edges of the background are also from the stamp set. I used Green and Yellow Green Aqua Pigments to color it.

As you can see from this card, Magical Shattered Glass Foil works great with all the different color Chroma Glazes that Brutus Monroe offers. Here I used it on the background over swirls of Chroma Glaze used with the Deco Flower stencil. For the butterfly on the left, I repeated the process from the card above using purple and pink Chroma Glazes. For the butterfly on the right I used Chroma Glaze with the solid butterfly part of the stencil and then used Magical Shattered Glass Foil.

There are so many different ways to use this bundle. The card below shows two different ways I used Magical Shattered Glass Foil. I smeared various colors of Chroma Glaze on white cardstock. Once it dried, I ran it through the laminator with Magical Shattered Glass Foil and then die cut out the solid butterflies. Then I used black toner paper and ran that through with Magical Shattered Glass Foil and die cut the detail butterfly dies to layer on top. The flower images stamped on the bottom in Raven Black Detail ink are also from the “Magical Monarchs” stamp set.

This bundle has so many possibilities! Be sure to check out Brutus Monroe for all the new products and to see more ideas from the 2022 Inspiration Team.

0

Come together, right now…

…over embossing powder and stamps! When the masterminds from Gina K. and Brutus Monroe come together, the results are bound to be amazing. Enter the new “Seeds of Joy” 6X8 stamp set from two of my favorite companies. This gorgeous set has a lot of options. There’s a giant flower cluster as well as a small flower. And the cutest part – a seed packet. There are also a variety of sentiments for different occasions.

But wait! There’s more. Do you love Gina K.’s Wisteria ink? Then you will love the new Wisteria Embossing Powder. This beautiful color is a perfect companion for Seeds of Joy.

I was lucky enough to be a part of the amazing collaboration. I got to explore just how wonderful these two company’s products come together. Here are the samples I created.

This background was simple to create with Brutus Monroe Blue Violet and Lilac Purple Chroma Mists. I used a wet on wet technique on Brutus Monroe Aqua Pigment Paper. I used the stitched layer die from Spring Saying Dies. (That was part of the amazing Spring Release from Brutus Monroe.) The flower cluster from “Seeds of Joy” 6X8 stamp set was stamped with the new Wisteria Embossing Powder on Heat Resistant Vellum. I stamped the sentiment on my favorite black cardstock – Brutus Monroe’s Raven. I added a few black sequins for accents. I also used Raven cardstock for the layer on top of the card base.

For this rainbow card, I used the Wreath Builder from Gina K. I colored each with Copic Markers. For the background, I repeated the large cluster on Raven cardstock with Alabaster embossing powder. The same supplies were used for the sentiment.

For this card, I tool a much simpler approach. The image and sentiment were stamped with Raven Detail Ink on Perfect Blend Alcohol Marker Cardstock. I colored the image with Copics, then ran it through my die cut machine with a textured embossing folder.

This card was fun and easy. Again using Perfect Blend Alcohol Marker Cardstock, I stamped the images on the background with Catherine Pooler inks and then used blending brushes to gently brush color over each flower. I gently splattered water. I also used the brushes to brush colors over the seed packet. I masked the “Seeds of Joy” strip to keep it pure white. I matted each panel on Raven cardstock and put them on a card base. I added some Fabulous Fibers and Acrylic Bubbles for some decorative elements.

This was another simple yet elegant card to create. I stamped the large flower cluster with Raven Detail Ink on Perfect Blend Alcohol Marker Cardstock. Then I used masking Paper to mask off the flowers. I blended the background with Catherine Pooler inks and splattered then with water. Then I splattered gold paint before removing the masks. I stamped the sentiment and added black sequins for some decorative details.

I really enjoyed creating with this fabulous collaborative set from Gina K. and Brutus Monroe along with the new Wisteria Embossing Powder. I am sure these won’t last, so grab your today!

0

April Flowers

I know the saying is really “April Showers…” but at Brutus Monroe, April brings flowers! The stamp of the month for April is “Love Grows Here.” If you want to receive a new stamp in your mailbox each month for only $5, you can sign up here. And for only $5 more, you can join Stamp Club+ and receive the coordinating dies.

For this project, I used the stencil from March’s Stencil of the Month club called Delicate Floral. I blended the colors using inks from Catherine Pooler. Then I stamped the flowers from this cute set in Embossing Ink and heat embossed with Raven Embossing Powder.

If you’d like to get a surprise in your mailbox each month, Brutus Monroe has amazing subscription options for every budget!

0

How Sweet it is…

…to be in love with Brutus Monroe products. I am loving all the fun Valentine’s images and sayings in the love-ly new release. If you haven’t checked it out yet, you can see all the sweet stuff here.

For this card, I used the Sweeter Than Candy stamp & coordinating die set. This is from the Monthly Stamp Club Plus Membership which now gives you the option of including the dies. I fussy cut my images and used the dies on foiled toner paper to give everything a shimmery outline. I colored the images with ZIG Real Brush markers. I also foiled a Card Panel to use for the background. I created dyed papers using Chroma Mists on Aqua Pigment paper. Aqua Pigment paper is perfect for wet mediums. Using Chroma Mists on it is one of my favorite techniques. It’s easy to make beautiful, bright backgrounds. I used the dyed paper to create the shaker strip across the middle of the card and for the sentiment strip. I also used some leftover pieces to die cut the tiny hearts.

I added some finishing touches with sequins and twine. I also used glossy accents to give the jar of candy shine. Creating Valentines for loved ones with products you love is easy at Brutus Monroe.
0

What’s Cooking, Birthday boy?

Today I am celebrating the birthday of someone very special to me, someone who makes it possible for me to do what I love, everyday. My husband, and very own personal chef – Fred. His cooking is unmatched because he does it with his feelings. Good or bad, they go into what he cooks and sometimes the unexpected happens. Which is exactly how I feel when creating projects. So, this was a very special card that I feel honored to have created. I wanted to capture Fred’s personality in this card and with all the amazing products from Brutus Monroe, I was able to do just that.

I used several of the products from the December Inspiration box called “Sugar and Spice.” The images are from “Sugar & Spice” 6X8 stamp set which also has coordinating dies. I stamped the images with Penny Embossing Powder on Perfect Blend Paper and added some light tones with Copics. The background is from the Sugar & Spice Card Panels. I used Tea Dye and Antique Linen Distress Inks.The sentiment is from the Sugar & Spice Conversation Clippings. I added just a few bits of bling to give it some sparkle like the one in Fred’s eye when he’s serving up some love.

Below are some more examples of projects using products from the Sugar & Spice line:

0

A Sweet New Year

It’s 2022 and I have a long list of crafty goals. Hopefully many of them will be sweet enough to stick. To kick off this sweet new year, I am sharing my first project for Brutus Monroe’s 2022 Inspiration Team. We are starting the year off on a sweet note with some new Valentine’s products. You can view all those here.

For this card, I used the new “Sweet Candy” stamp set. I started by embossing some of the smaller images on the background with Alabaster Sparkle Embossing Powder. Then I blended Distress Oxide Inks in Picked Raspberry and Spun Sugar, and added a bit of Seedless Preserves on the edges. I finished it off by splattering water.

All the images were stamped in Raven Ink and colored with copics. There is also a coordinating die set to go with “Sweet Candy” .

I used Salvaged Patina Distress ink on white cardstock to create a coordinating layer and die cut for the sentiment. The sentiment is also done with Alabaster Sparkle Embossing Powder. I finished it off with some glitter glue and rhinestones for a little extra sparkle.

Don’t forget to checkout all the fun new products at Brutus Monroe and check back next week for more Sweet Inkspiration!

0

Something spooky this way comes…

Hey gals and ghouls, have you checked out the terrifyingly awesome new fall release at Brutus Monroe? Along with all the gorgeous autumn stamp sets and new fall Chroma Mists, fun and festive papers and creepy Halloween monsters, you will find this adorable set of “Spooky Kids.” They are sure to delight this Halloween. Take a trick-or-treating adventure with them.

This spooky Halloween treat box was made using Brutus Monroe’s Lime Pillow Boxes. Keeping it flat, I used Purple Galaxy Glaze with a star stencil. I layered a black felt doily and a circle die cut of one of the designs from the new “Happy Haunting” paper pad. I colored the witch from the Spooky Kids set with Copics and die cut a few layers to make her stand out. I added some Fabulous Fibers behind her for an accent.

To check out an interactive card I made using some of the other characters from “Spooky Kids,” check out this post. You can see the video here.